Modding LEGO Creator Expert 10298 Vespa 125 for the mod generation
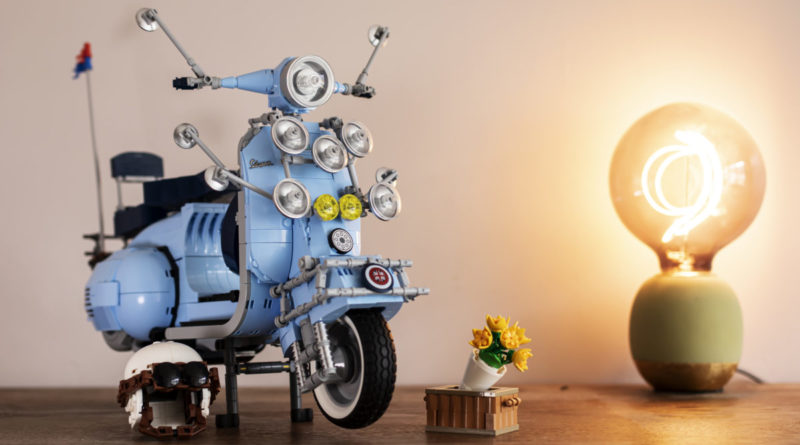
LEGO Creator Expert 10298 Vespa 125 is already an incredibly stylish model, but with a few simple modifications it can transform into a true motoring icon from the 1960s.
First engineered in 1946 by Italian motoring company Piaggio, the humble Vespa was originally conceived as a utility vehicle – but quickly began to symbolise freedom and imagination, and shot to fame in the 1960s as the mode of transport for the ‘mod’ generation.
10298 Vespa 125 beautifully recreates the original 125cc model from the 1960s, and by following our simple steps you can transport it from the Roman roads of Italy into the swinging ’60s of London with our mod-style makeover.
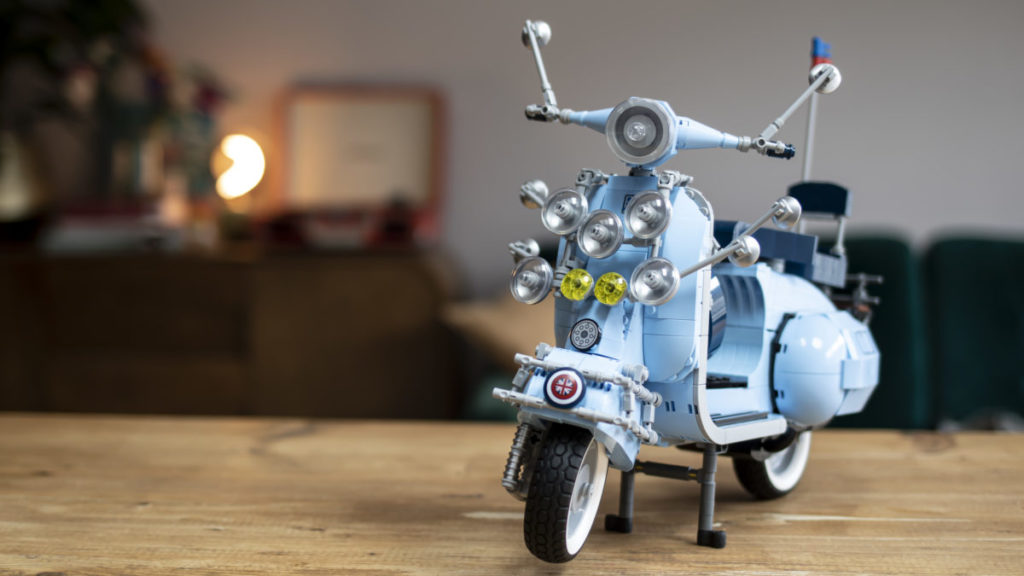
— The front rack, lights and mirrors —
The mods are widely considered the first true British youth subculture, a fashion-focused group who placed great importance on their appearance and their love of music. The Vespa went hand in hand with their style, and it quickly became as much an important fashion accessory as the clothes they wore.
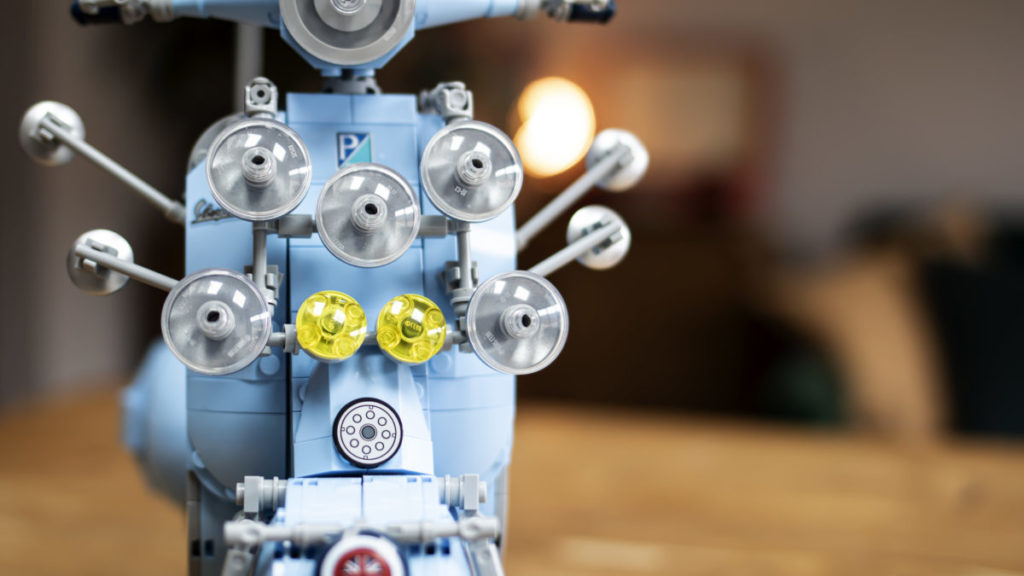
The already-stylish scooter was custom-fitted with assortments of lights, mirrors, flags, badges and whatever other paraphernalia its owner wanted to add, all the while preserving the classic look that made the Vespa so popular in the first place. The most common of these upgrades were a front luggage rack, wing mirrors and lights that adorned the front.
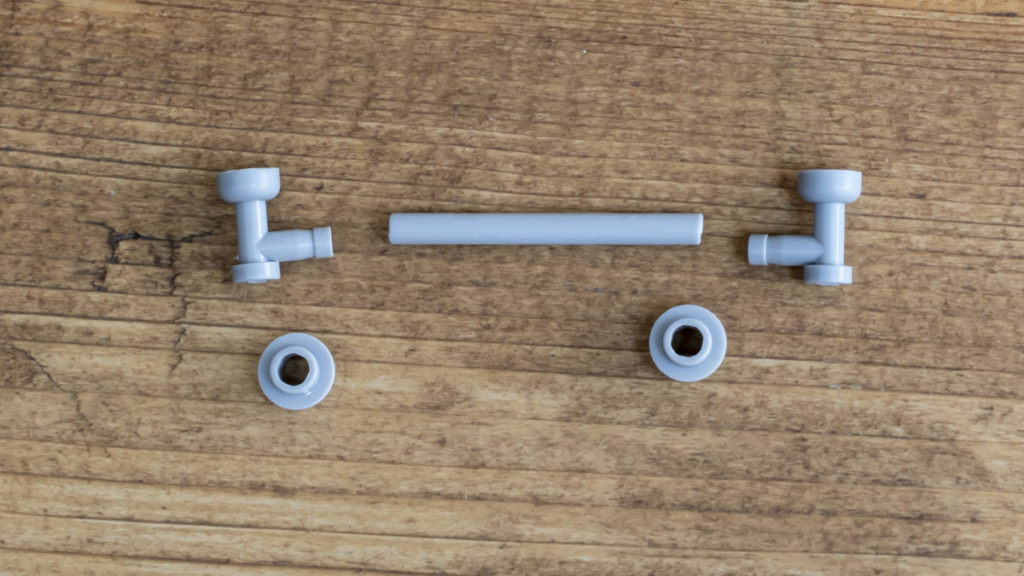
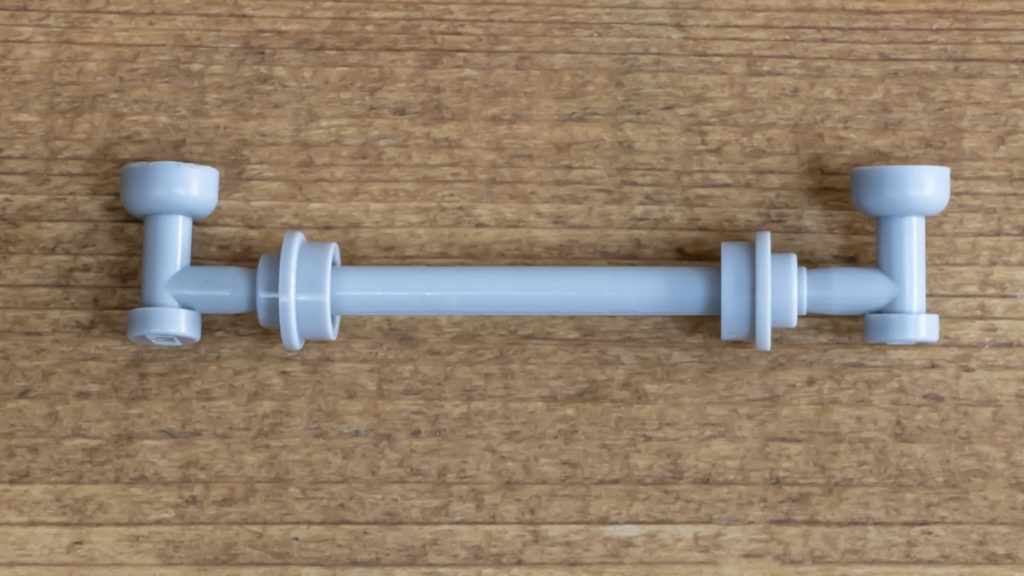
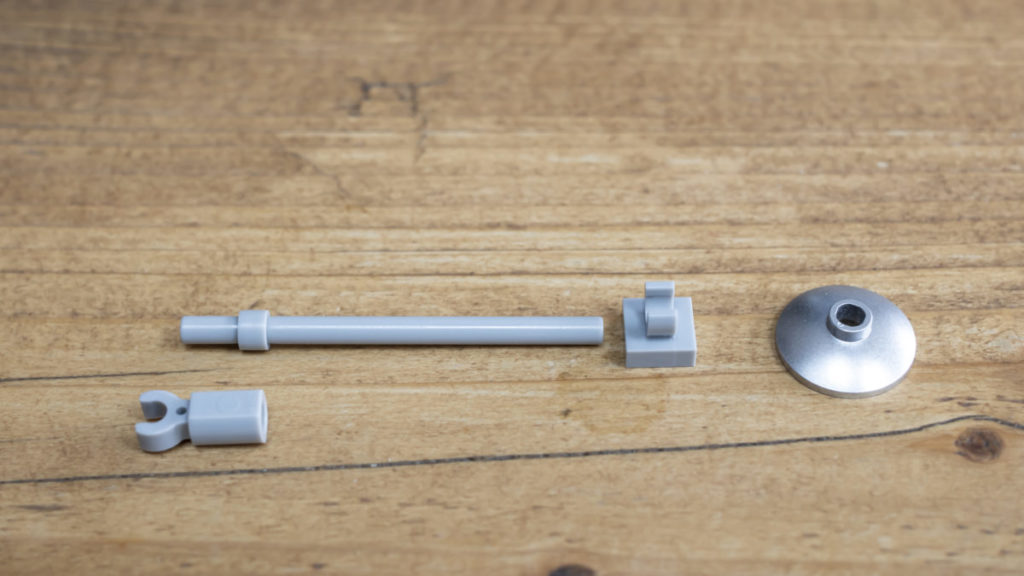
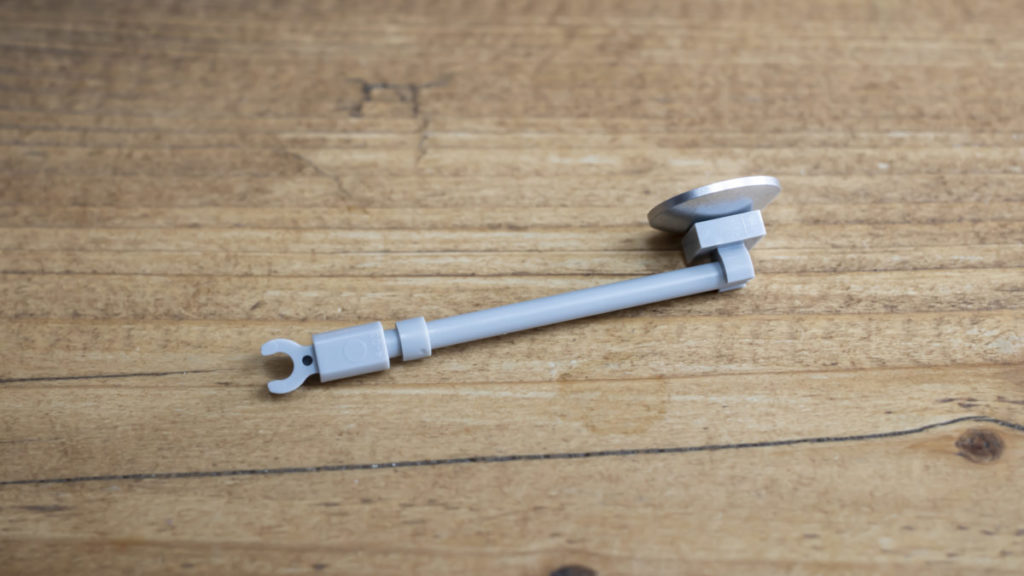
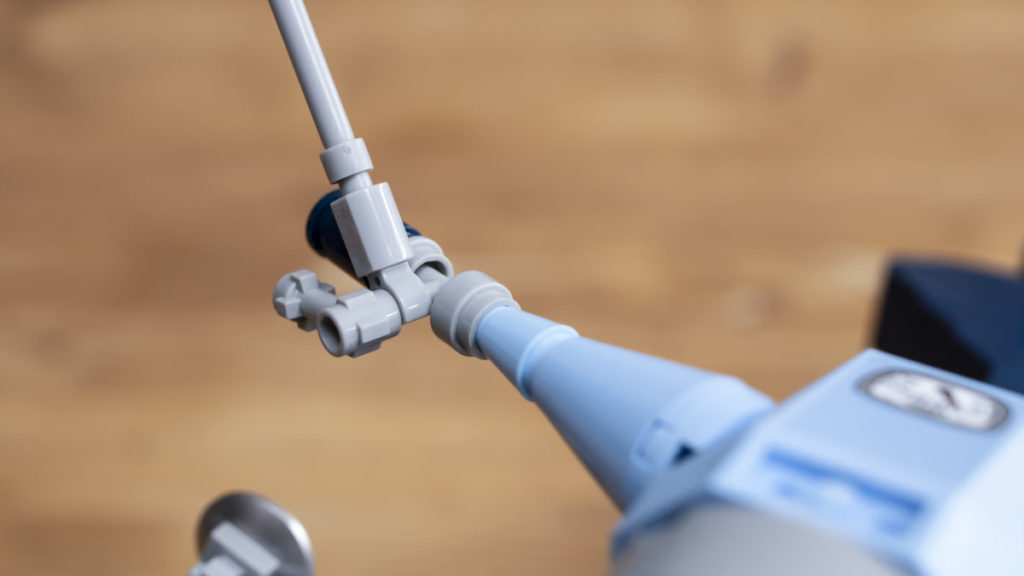
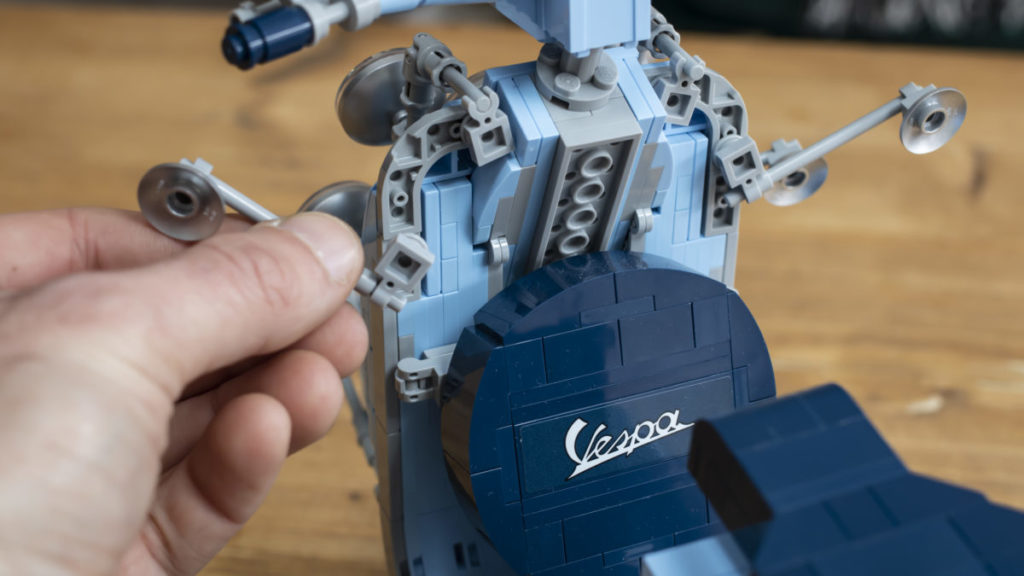
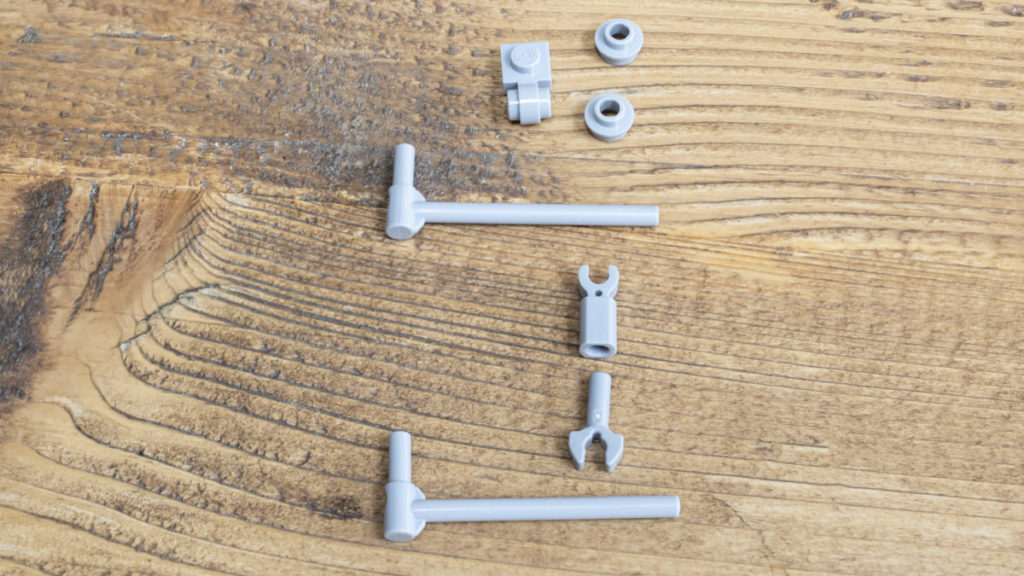
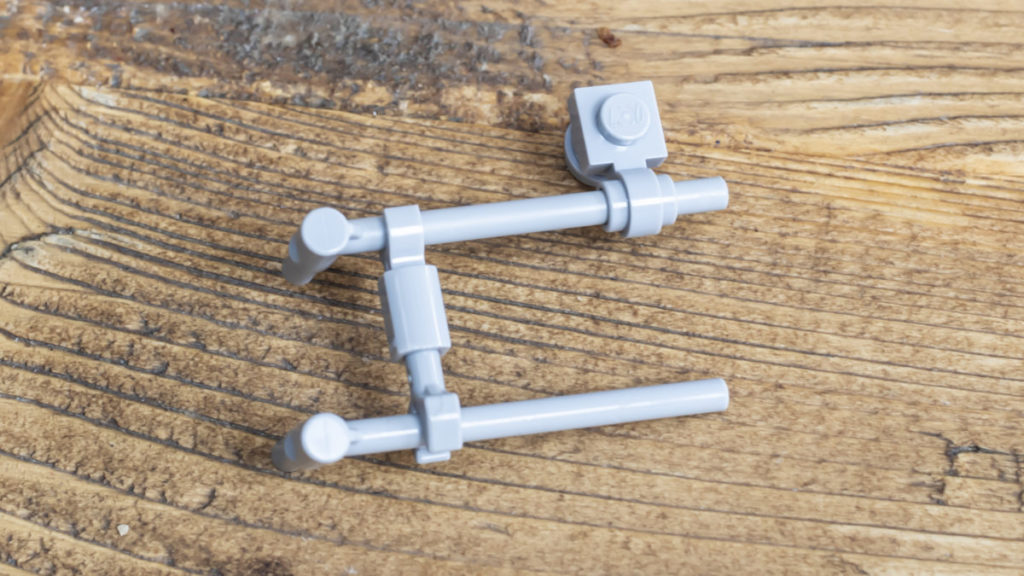
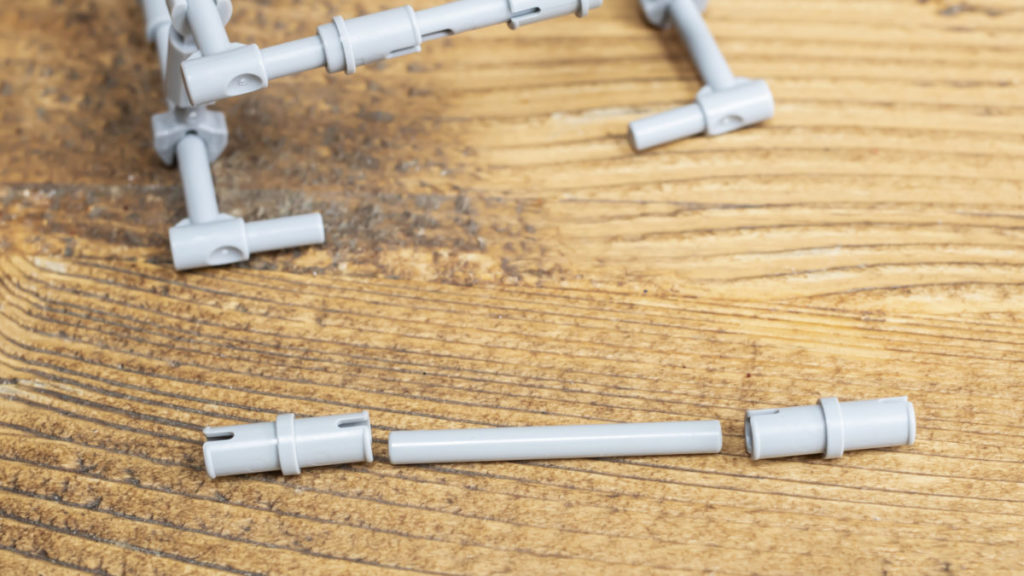
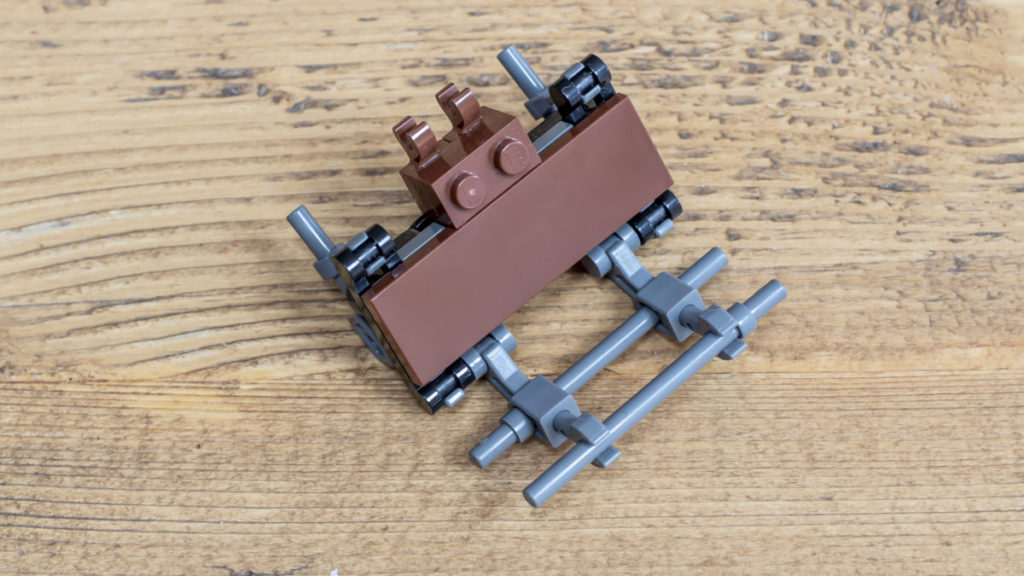
The luggage rack is a fairly simple build, comprised of a number of Technic bars connected using bar holders with clips and mechanical claws to create the frame. Two Technic pivot joints allow the frame to hook on to the framework of the Vespa, and a 1×1 plate with clip on either side attaches to the 3L bar, which in turn connects to the back of the framework as shown. One wing mirror attaches to either side of the rack.
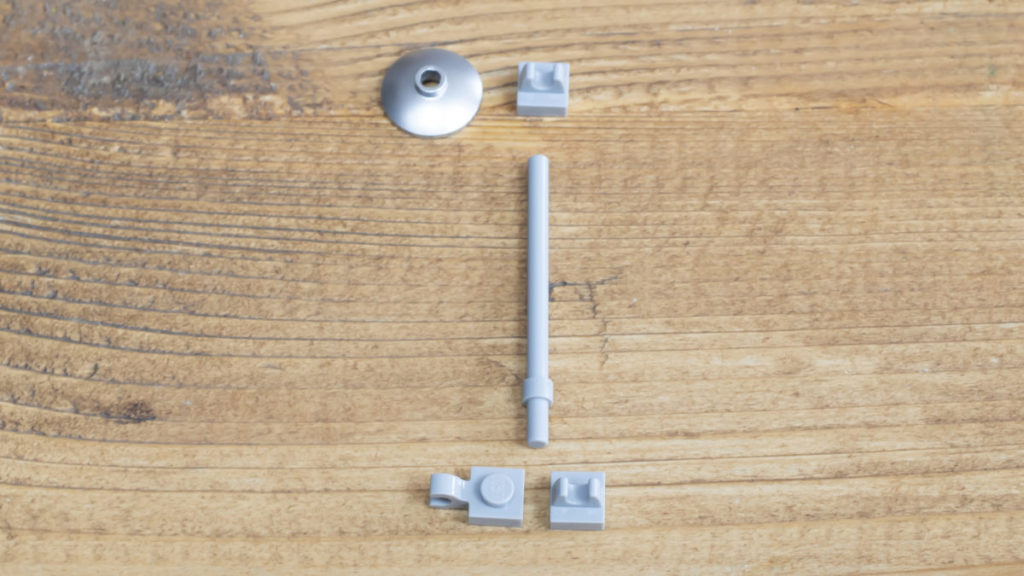
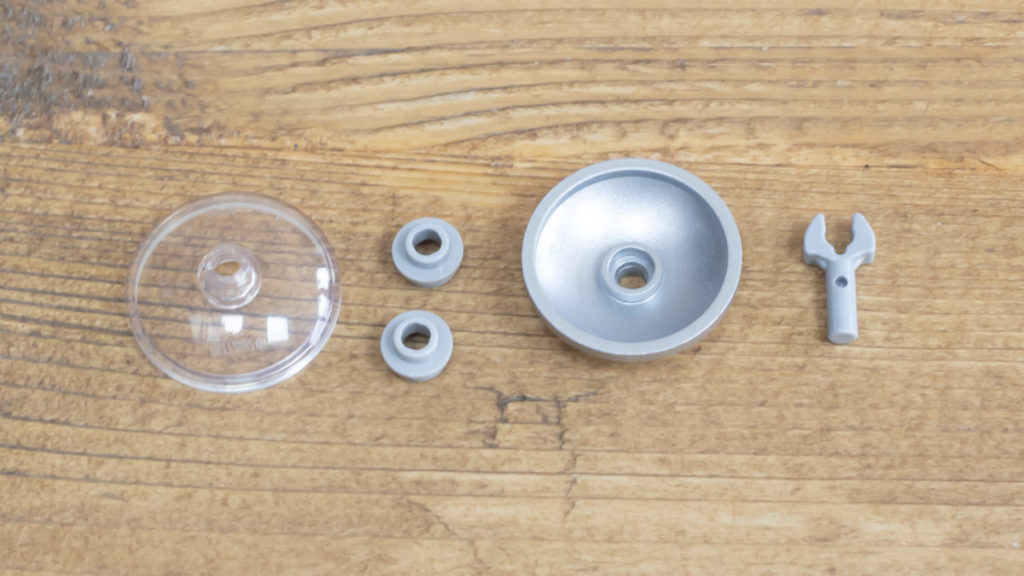
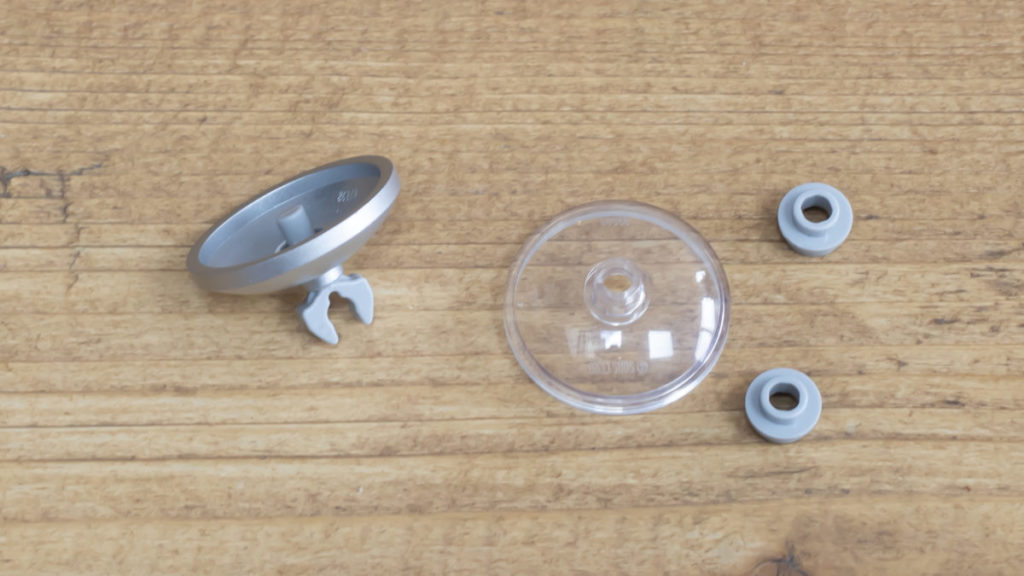
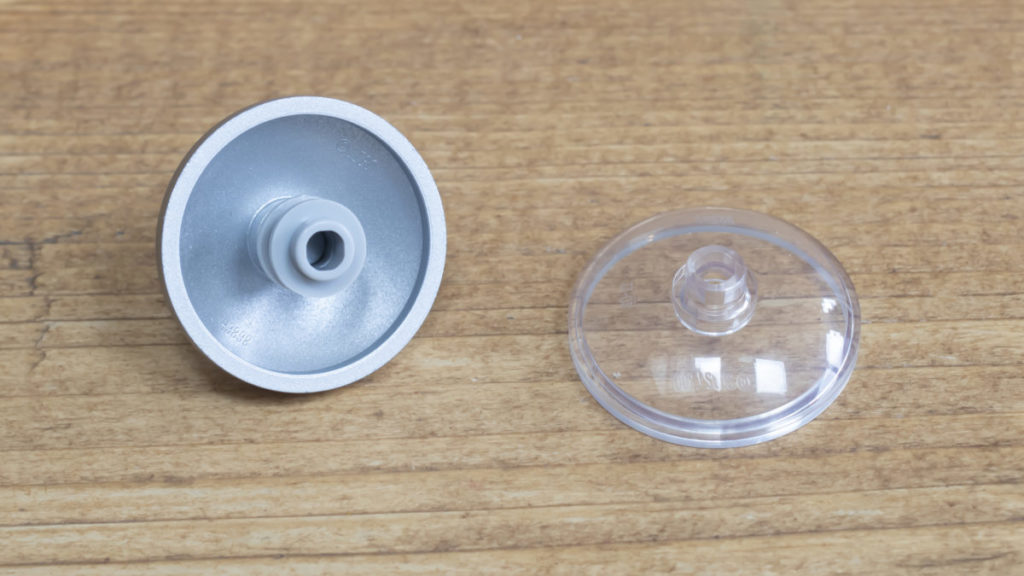
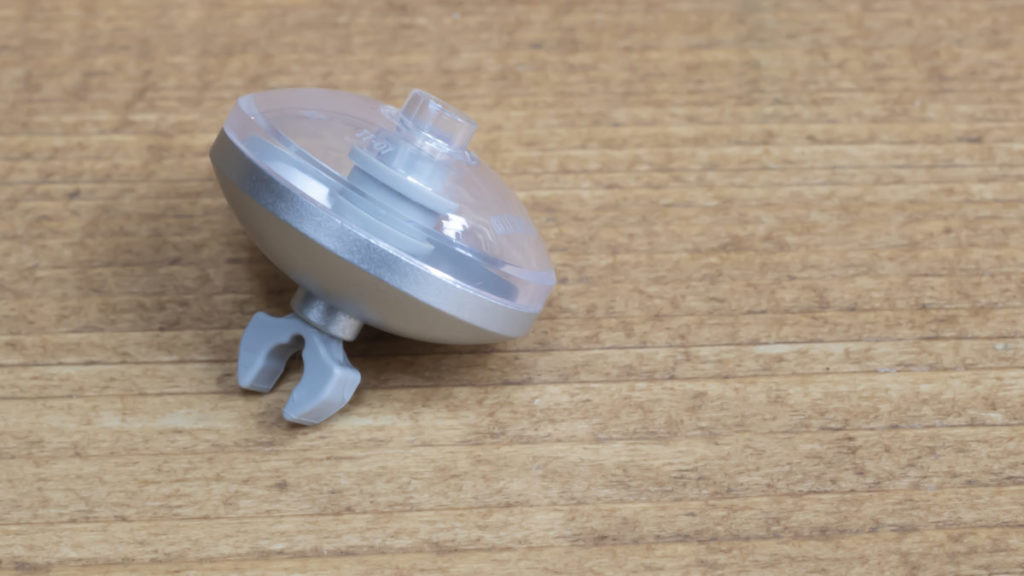
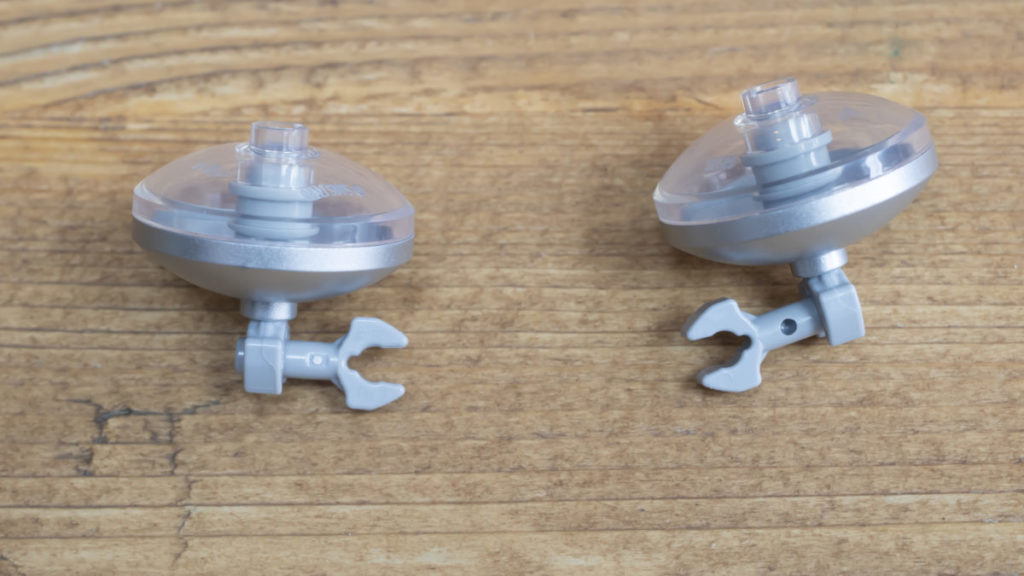
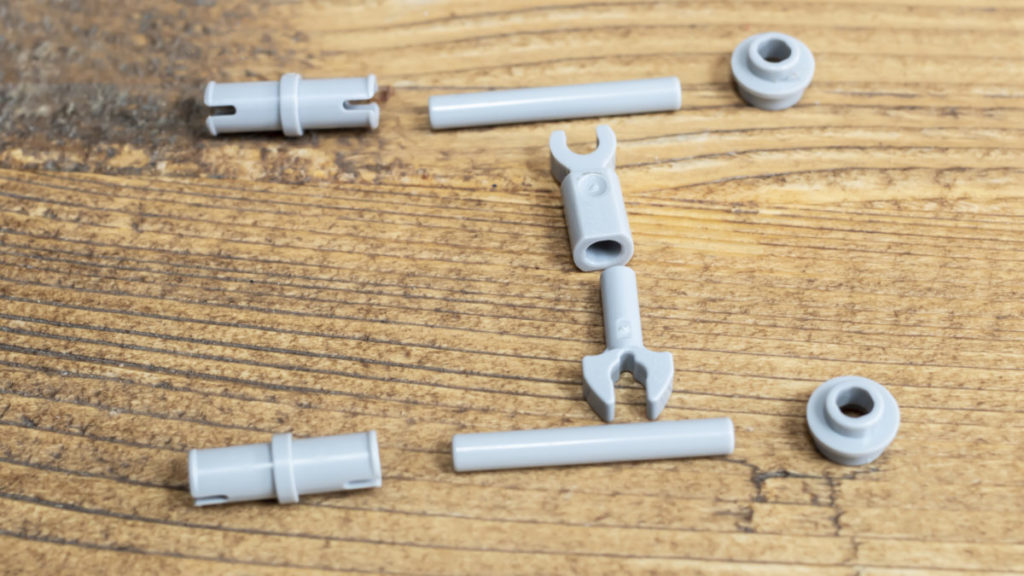
The large headlamps are all built in the same way. A mechanical claw is inserted into the back of a chrome 3×3 dish, while on the other side two 1×1 round plates with open studs connect into the exposed bar. Finally, the trans-clear 2×2 dish connects to the round plates. These lights can then clip on to the luggage rack.
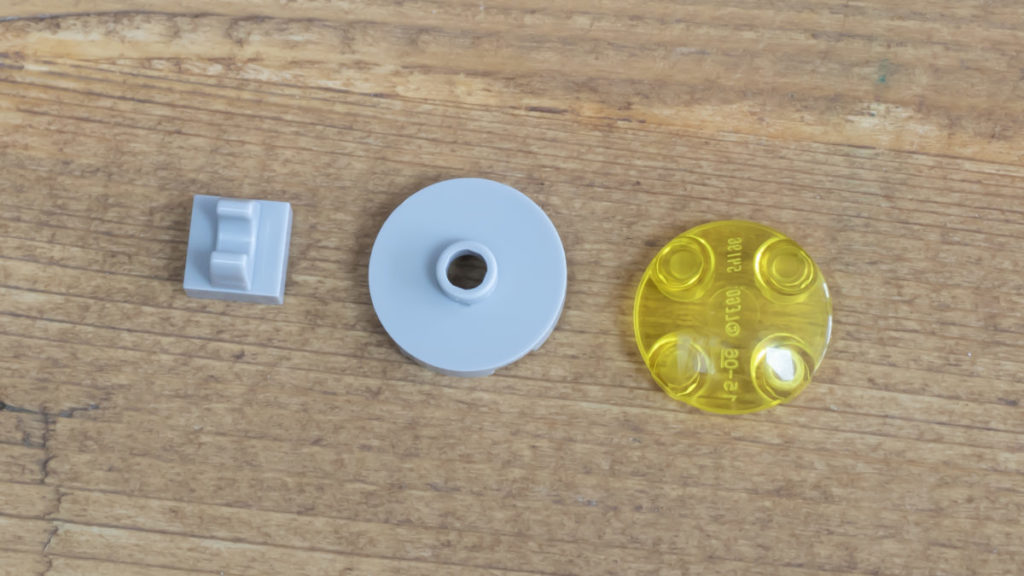
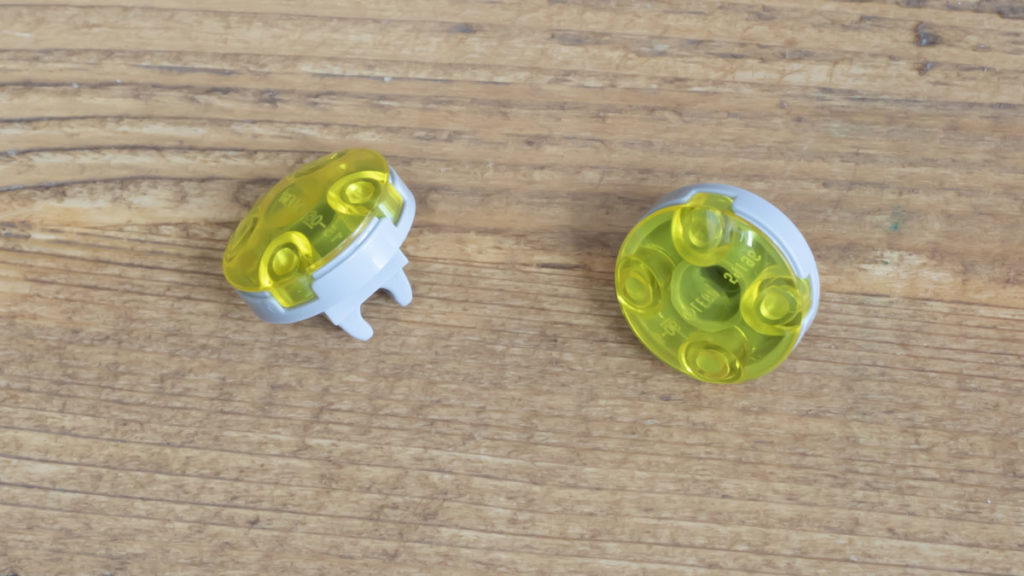
The exception to this is the two lights at the bottom that need one more mechanical claw to attach to the frame. The smaller lights are made from a 2×2 round tile with stud and a trans-yellow 2×2 rounded bottom. These attach to the frame using a 1×1 tile with clip.
The lights can be arranged however you want, and obviously as many can be added as you like – it wasn’t uncommon to see scooters riding down Carnaby Street in London with as many as 20, or even more!
— Additional wing mirrors —
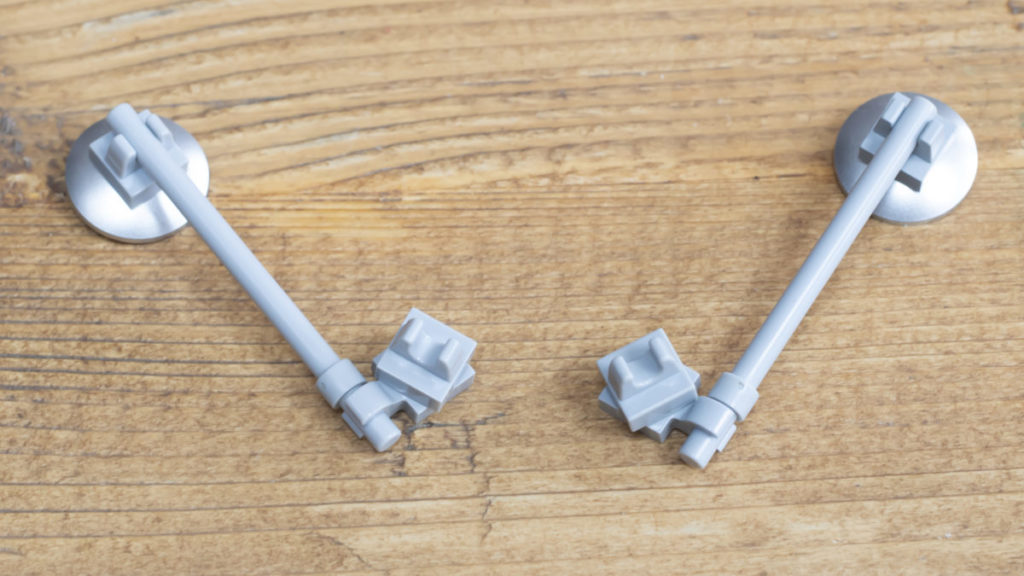
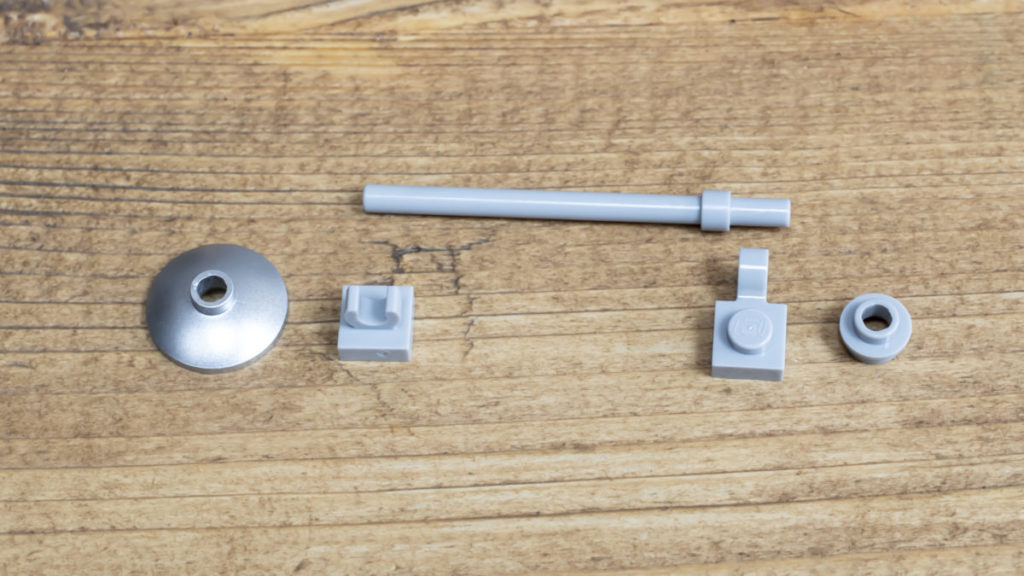
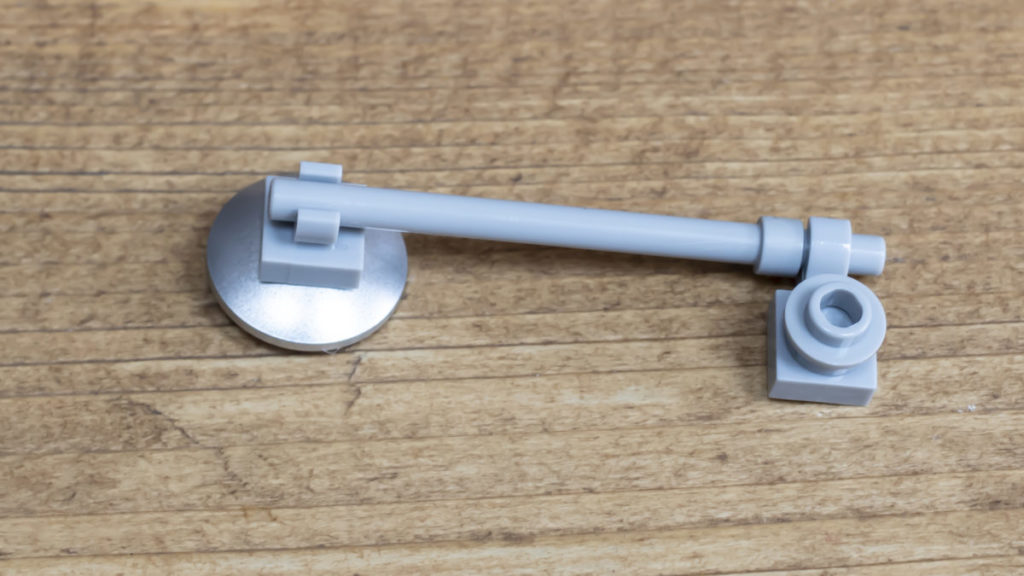
The extra wing mirrors along each side attach to the handlebars and the framework. Both share the same design of those attached to the front luggage rack, the only difference being that the wing mirrors that attach to the handlebars use a bar holder with clip, and those that attach to the frame use a 1×1 plate with clip and round 1×1 plate with open stud.
This allows them to be adjusted to whatever angle you like, but it’s worth noting that the wing mirrors on the handlebars will only fold down.
— The front mudguard crash bars —
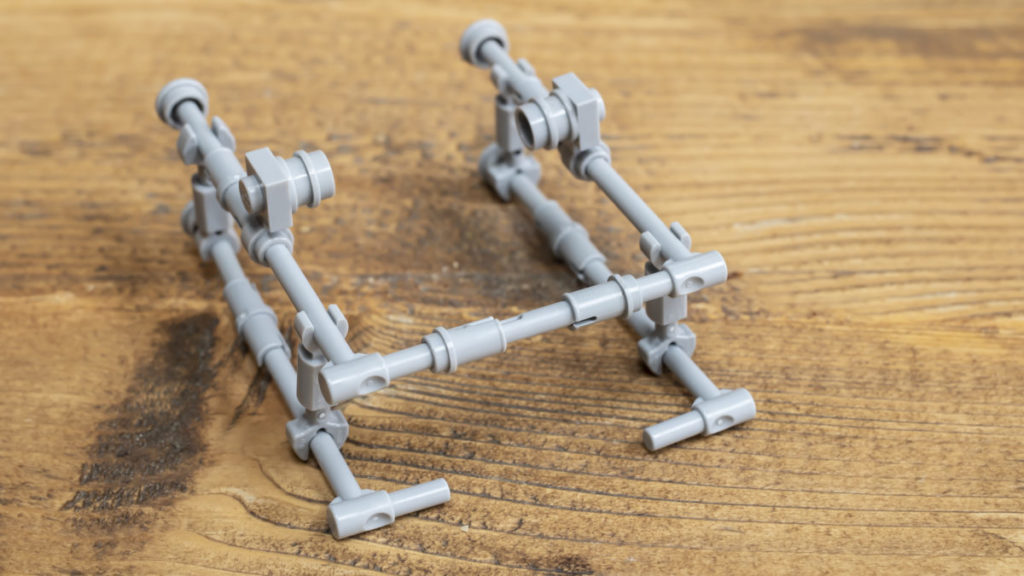
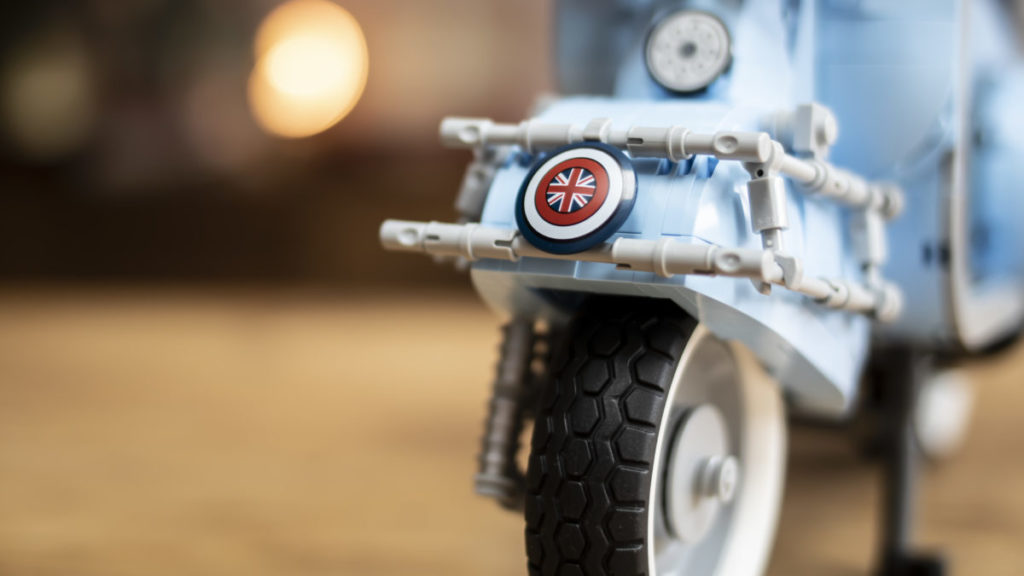
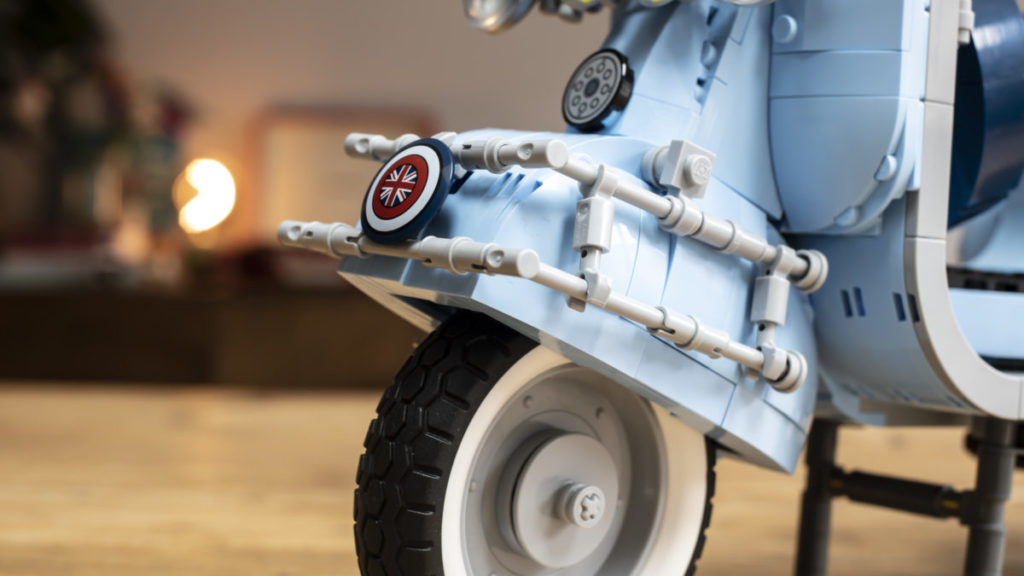
As well as the front luggage rack, myriad lights and mirrors, a Vespa’s front wheel guard would often have a chrome crash bar added too. This was mainly for decoration, and also allowed a badge to be attached to the front. This could have been a Vespa club badge, a Piaggio badge or any other emblem or symbol the owner wanted to display.
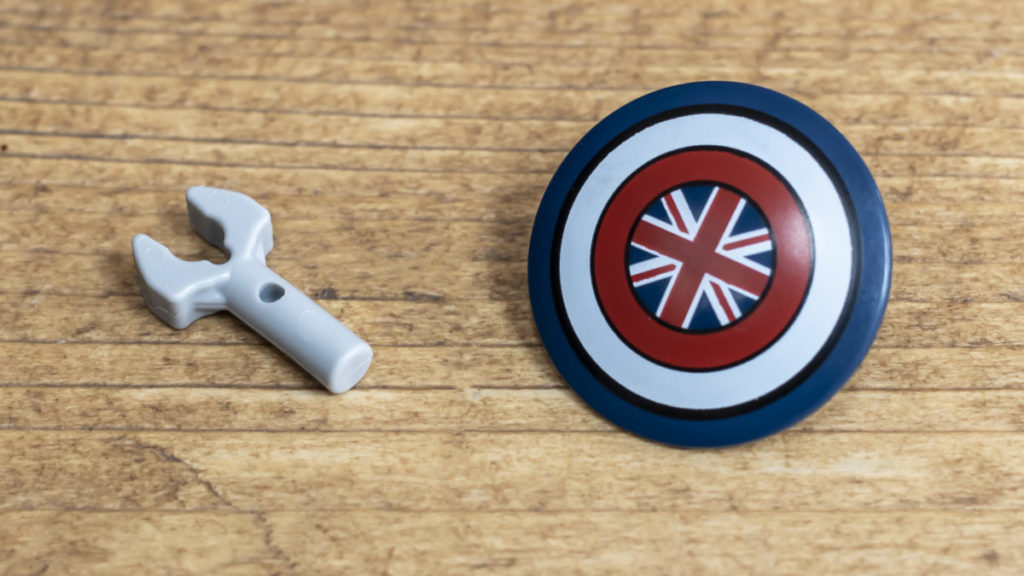
The Union Jack was a common motif among the mods, and so here we’ve added Captain Carter’s shield from 71031 Marvel Studios Collectible Minifigures. It’s the perfect scale and finishes off the look of the modified Vespa in a really authentic way.
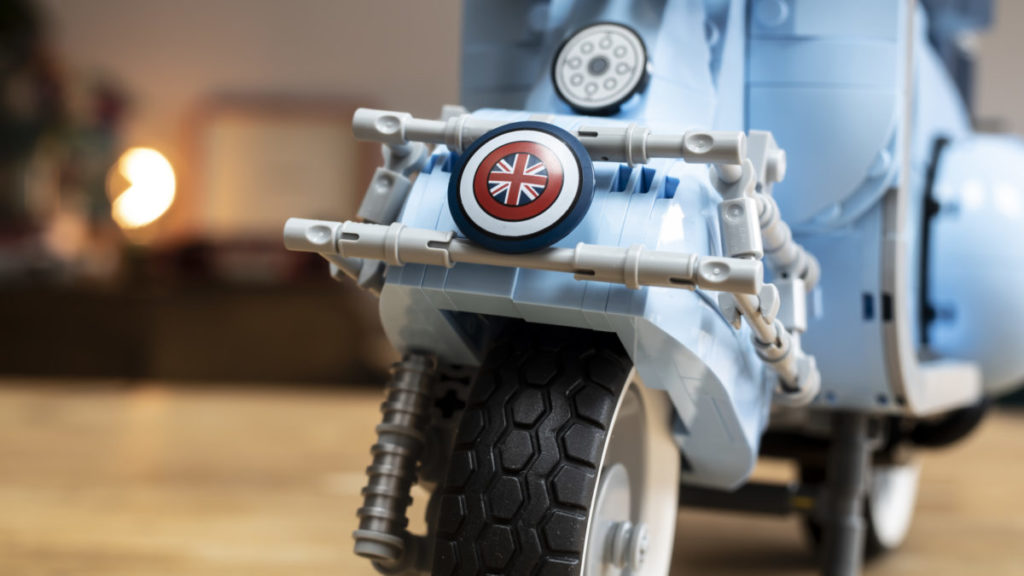
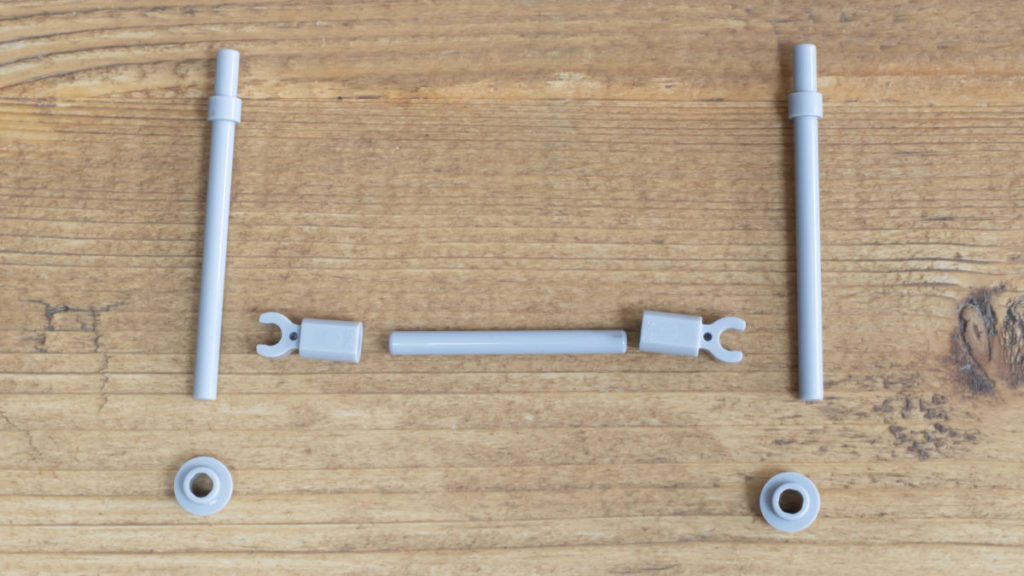
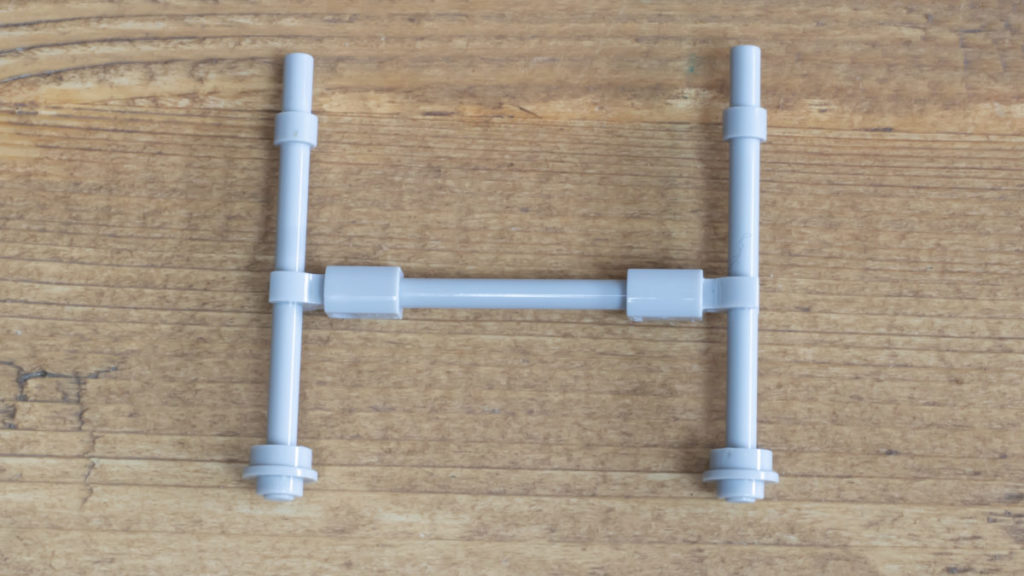
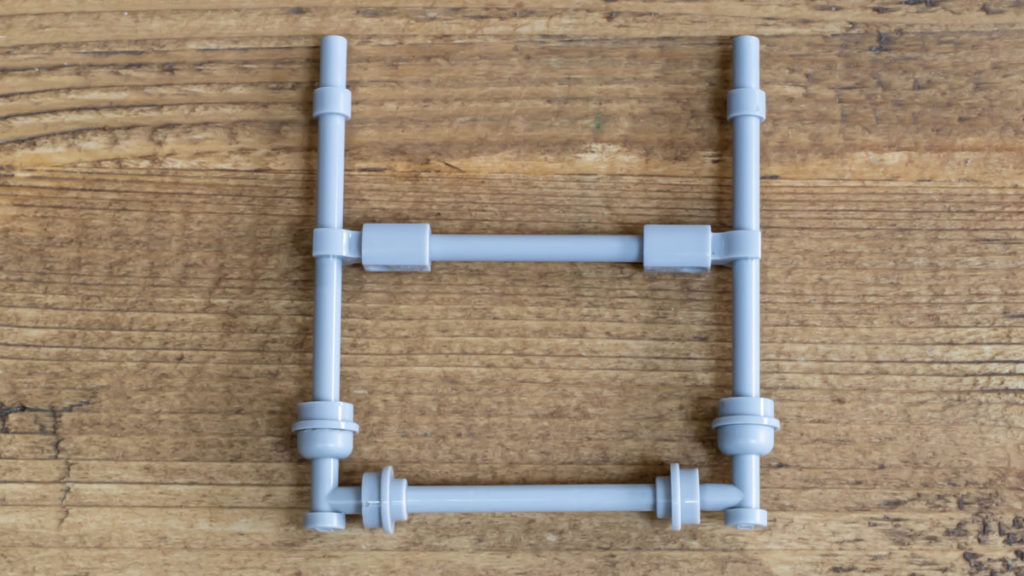
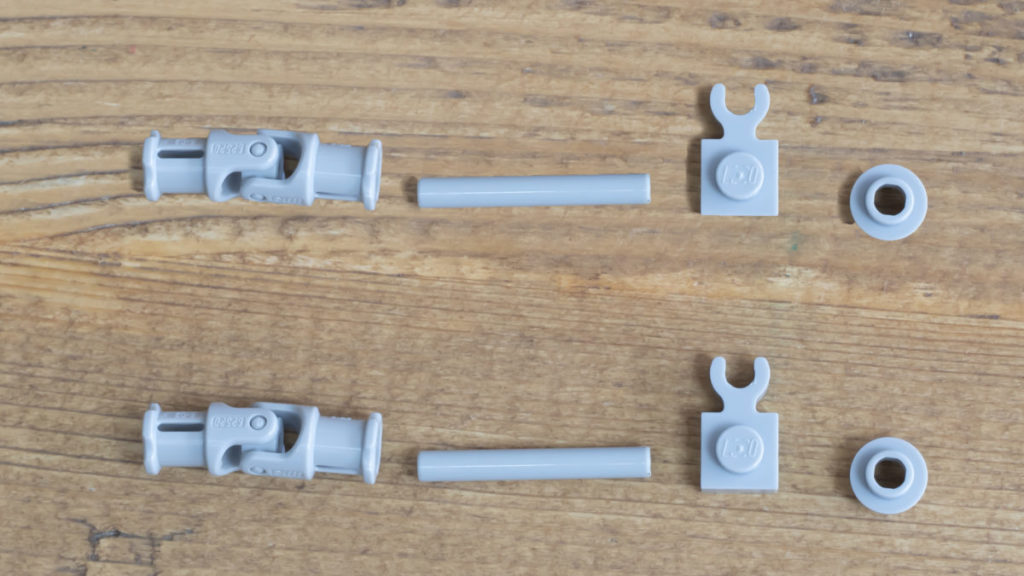
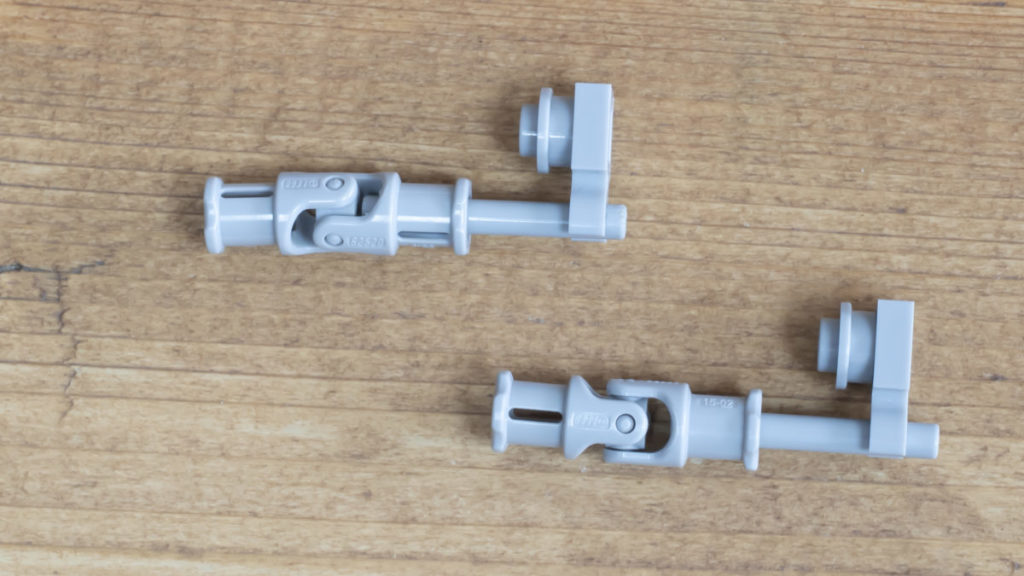
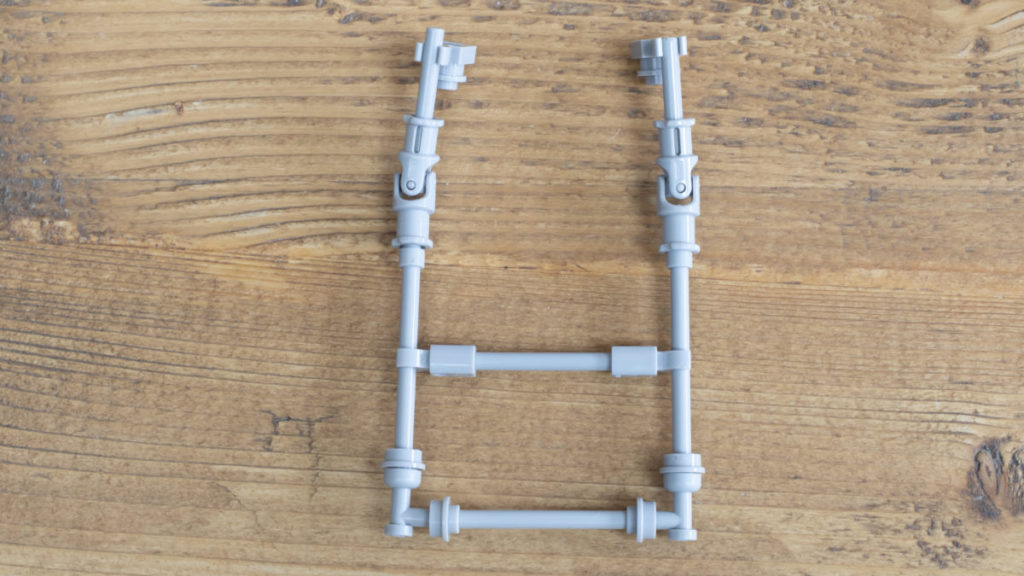
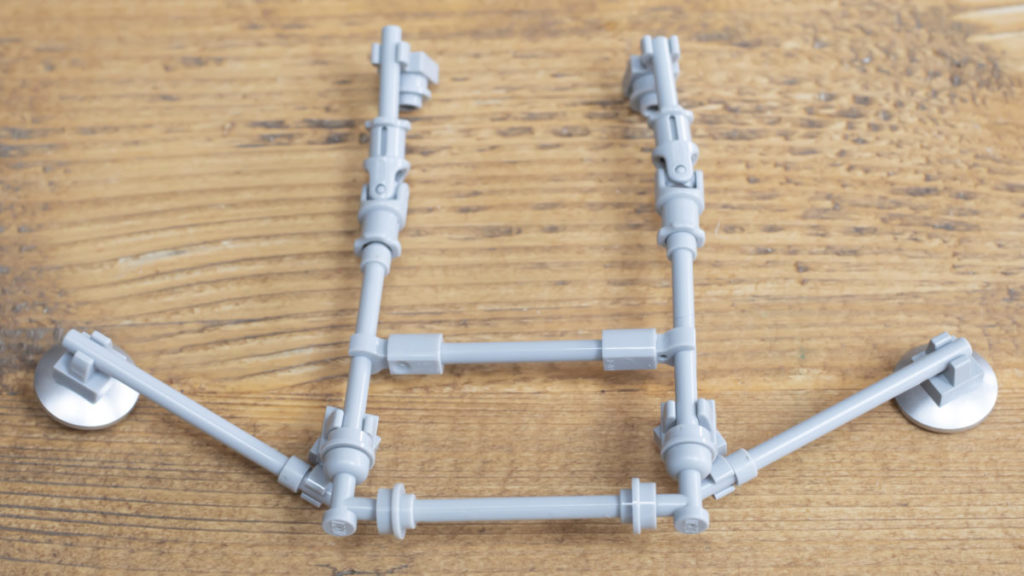
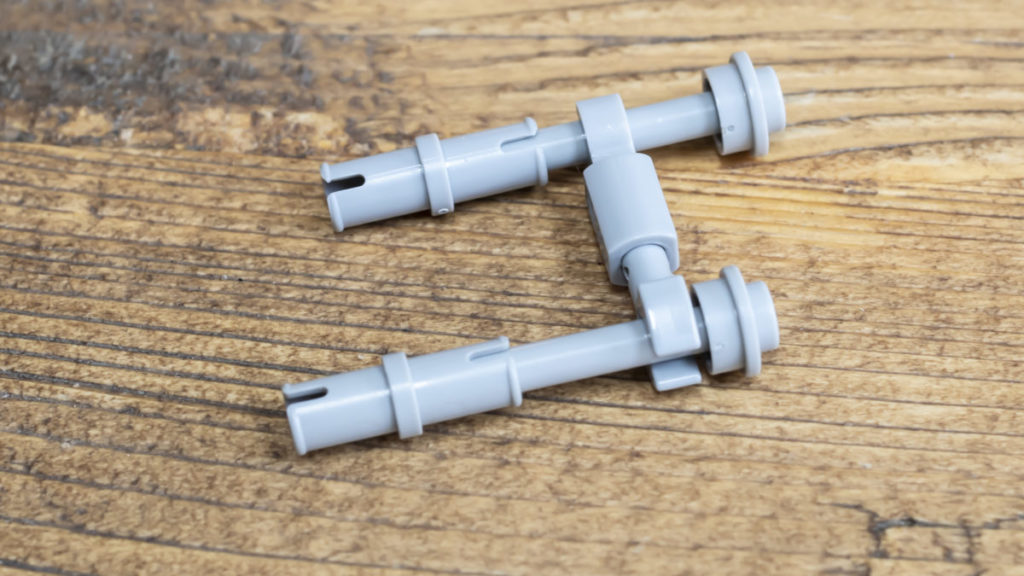
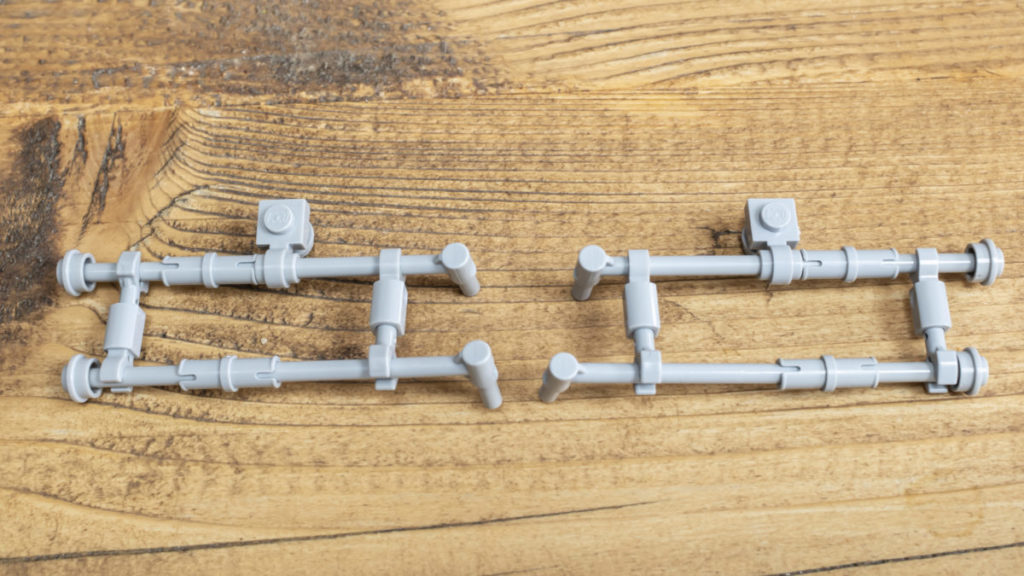
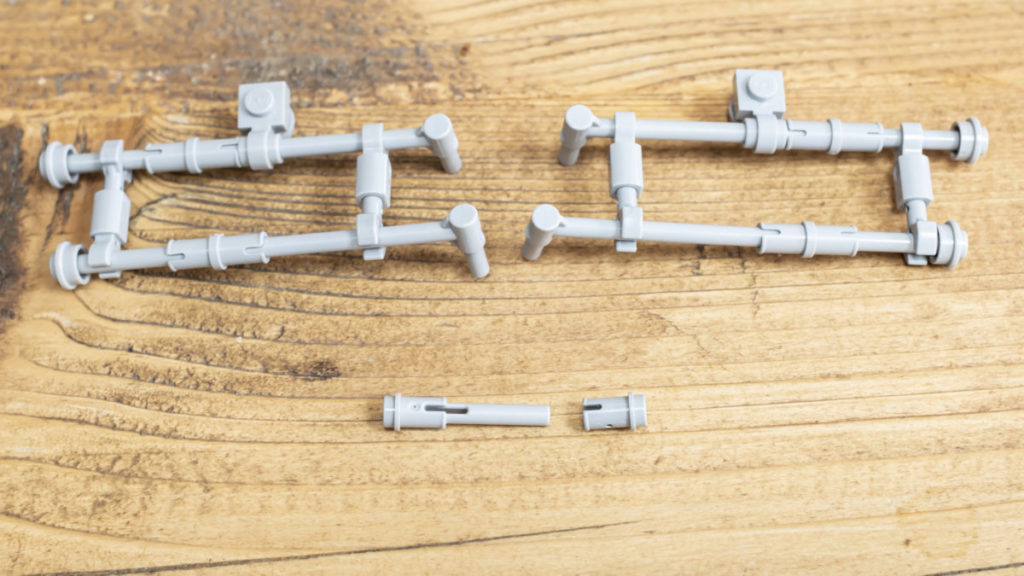
The front mudguard’s crash bars are constructed in a similar manner to the front luggage rack, using a series of bars and Technic pins connected together to create the frame. The first stages shown here demonstrate how one side of the frame assembles – in order to replicate this yourself, just repeat the steps but mirror them in order to create either side of the crash bar frame.
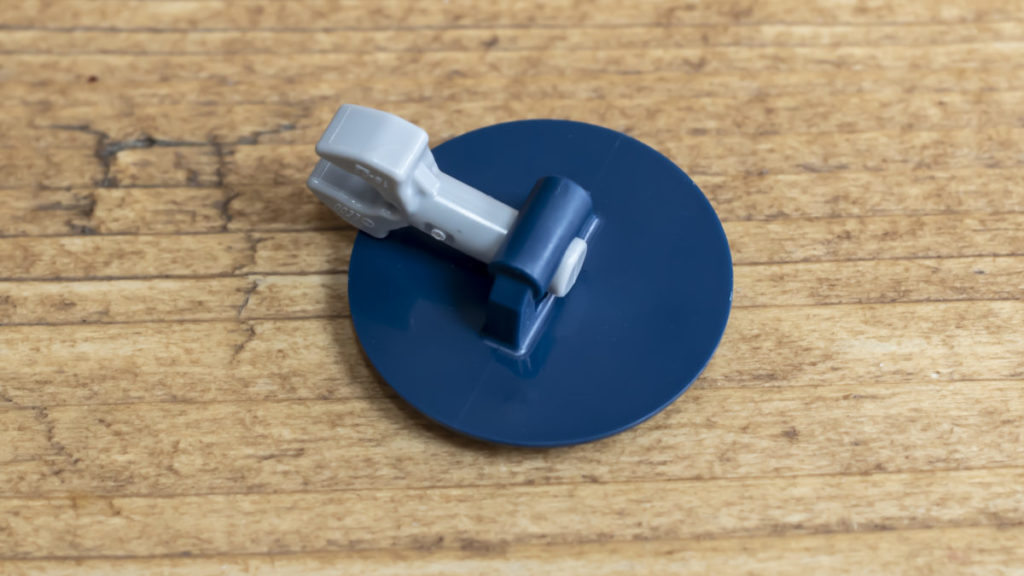
The front bars attach to the lower bars using a bar holder with clip and mechanical claw. The whole assembly attaches to the exposed studs that are on either side of the front wheel guard. Captain Carter’s Union Jack shield uses a mechanical claw slotted into the back, which allows it to connect to the frame. It’s probably not a ‘legal’ connection, strictly speaking, but it works.
— The rear seat —
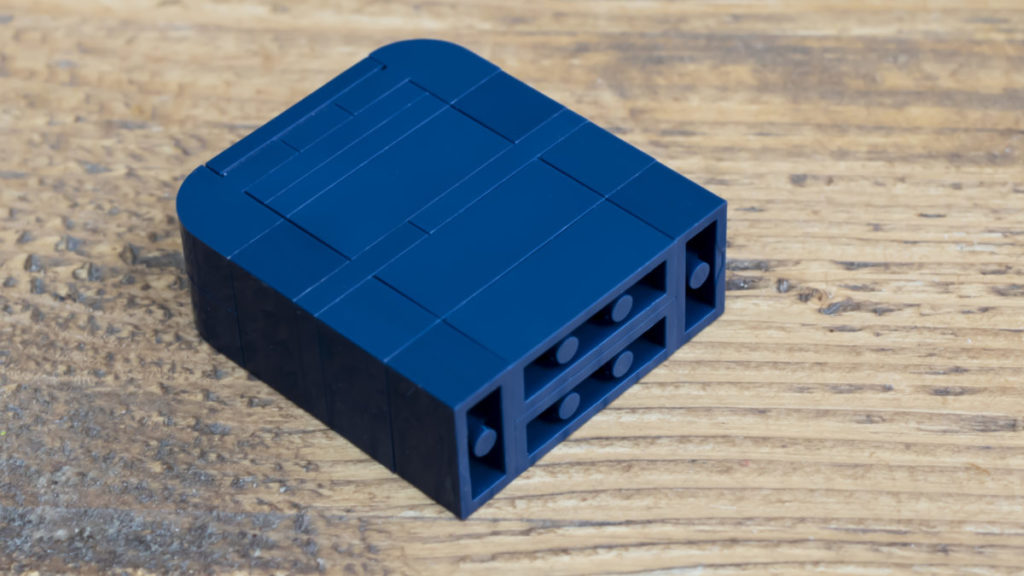
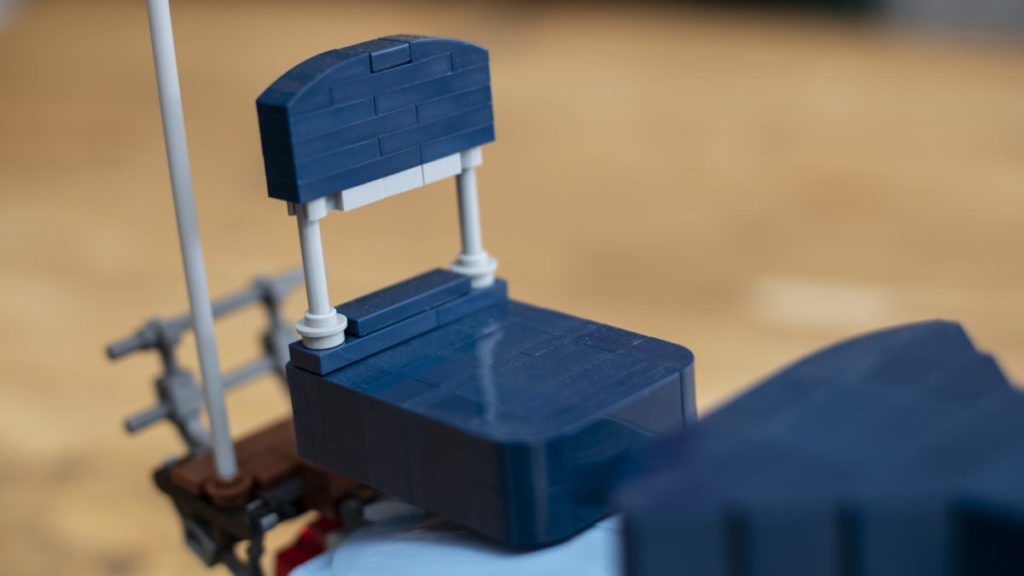
The seats of a Vespa were often modded to add a backrest to the rear seat. This allowed the passenger to travel in comfort, and added extra storage space for attaching anything from a spare wheel to a rolled-up fishtail parka (the jacket most commonly worn by the mods in the ’60s). The rear seat of 10298 Vespa 125 needs a little modifying to attach the backrest.
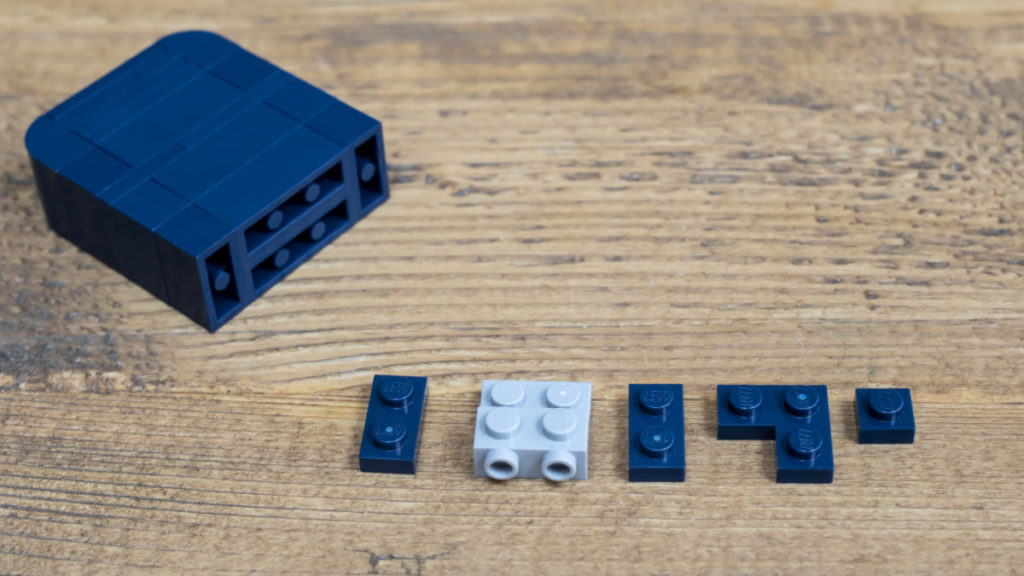
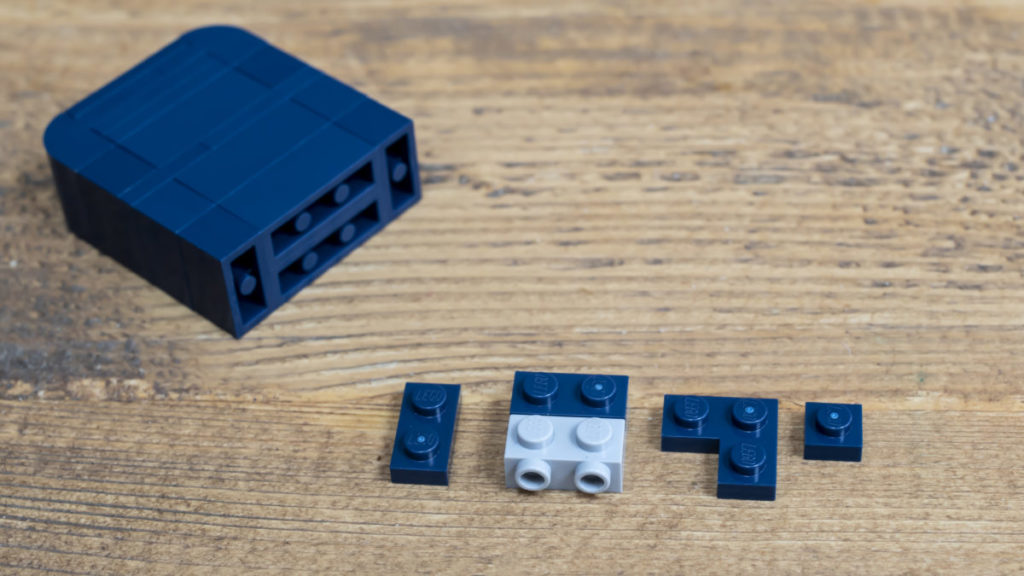
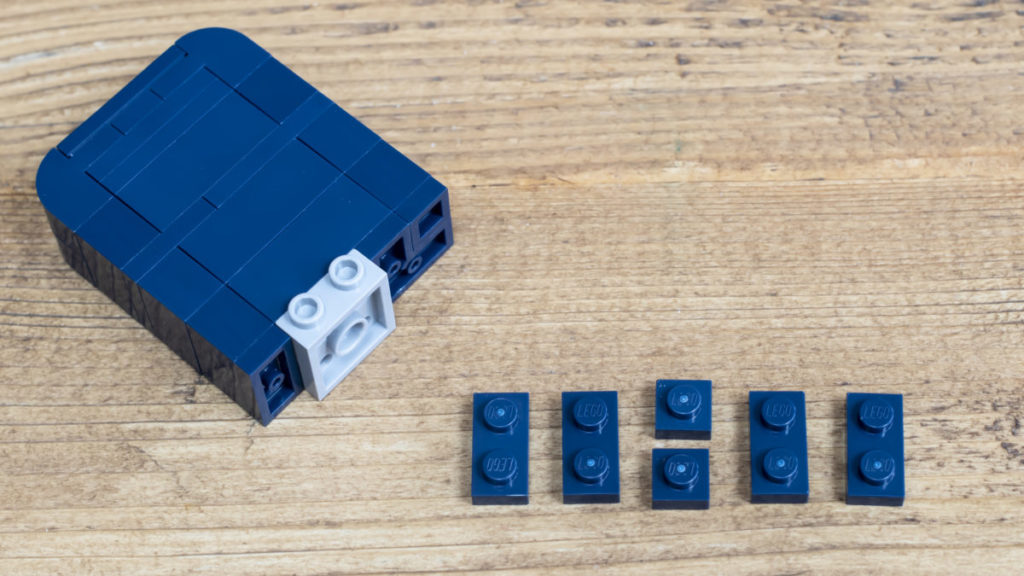
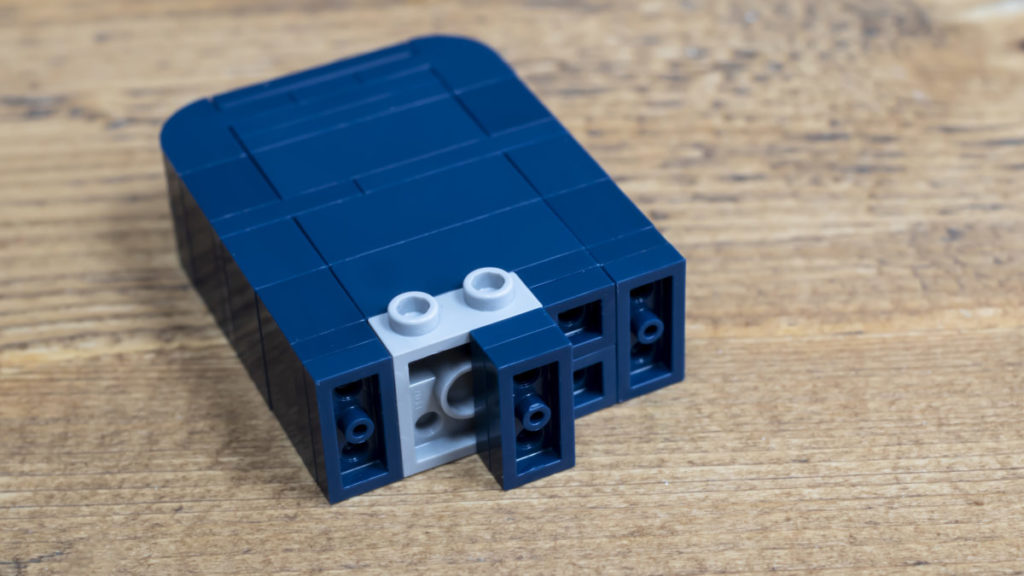
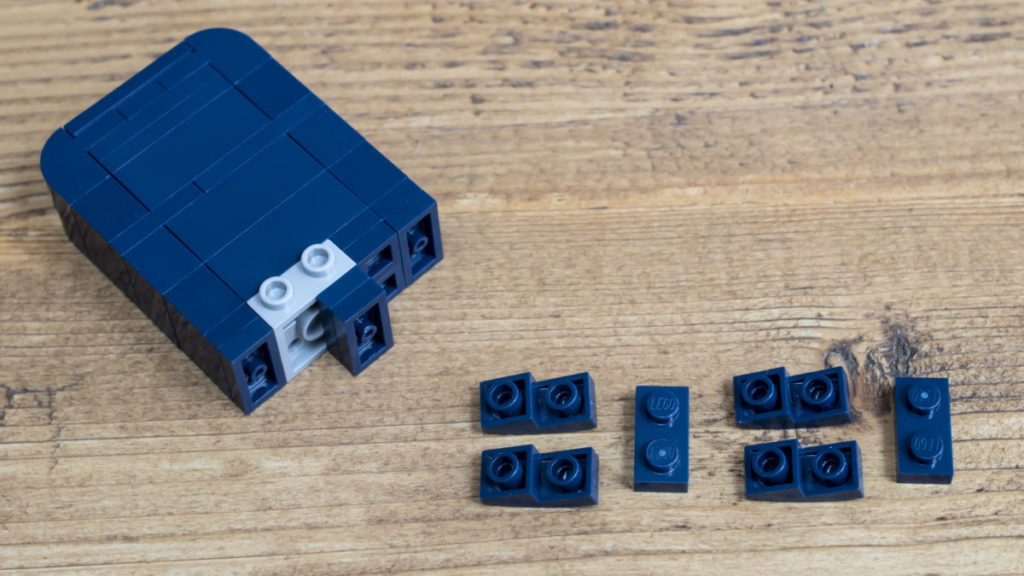
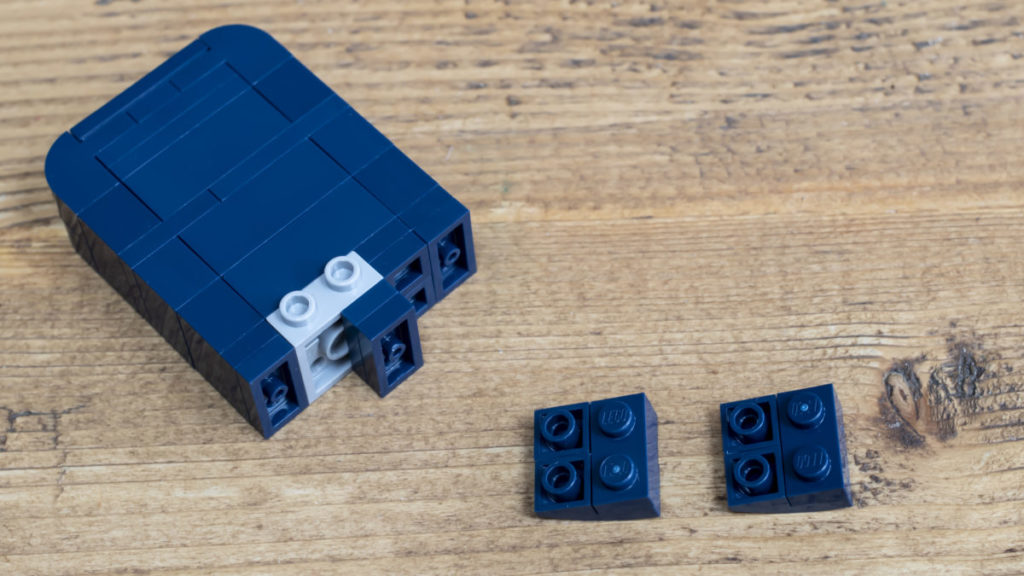
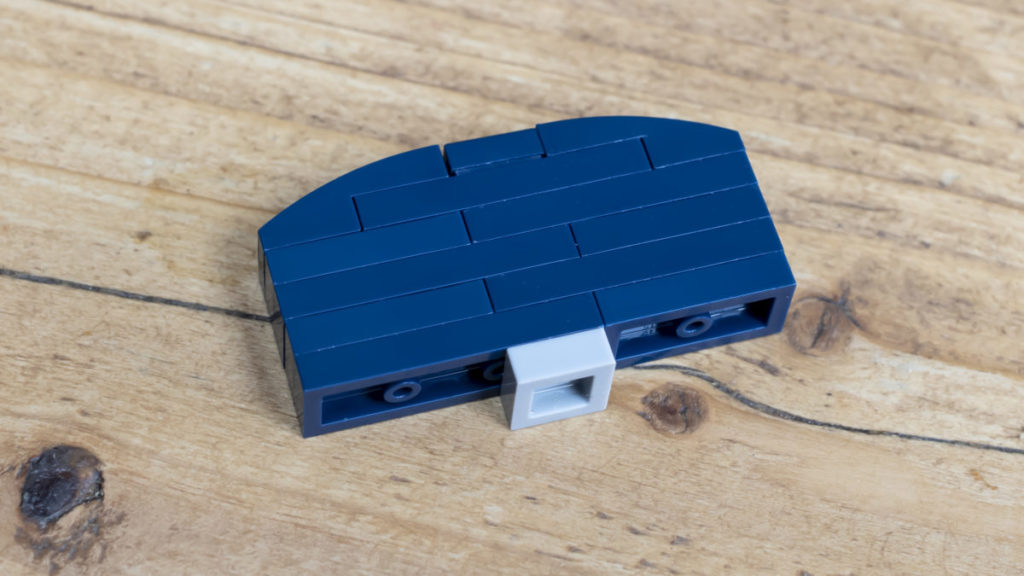
First of all, the rear seat will need adjusting. Keep the front of the seat as is, but remove all the pieces after the last 1×3 brick. Then attach the 1×2, 1×1 and corner plates, the 2×2 modified plate with studs on the side, the 1×2 inverted sloped curves and 1×1 tiles as shown. This extra plate’s width will allow the new backrest to sit flush with the rear seat.
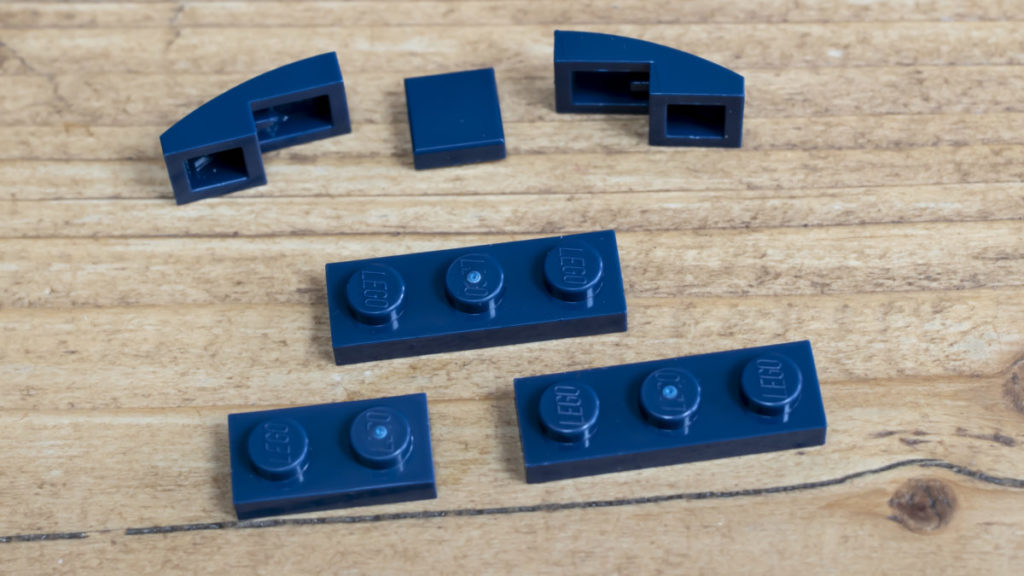
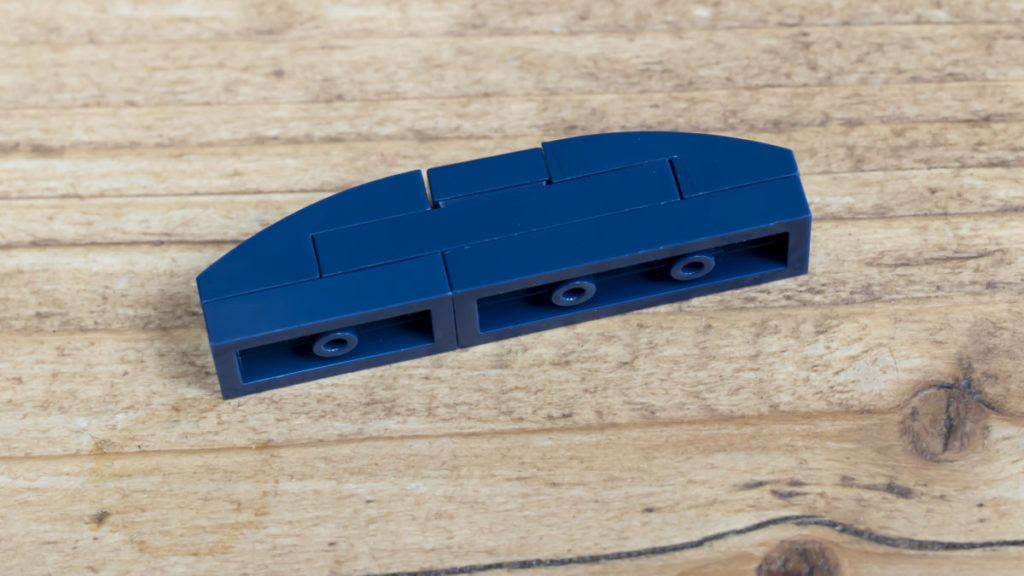
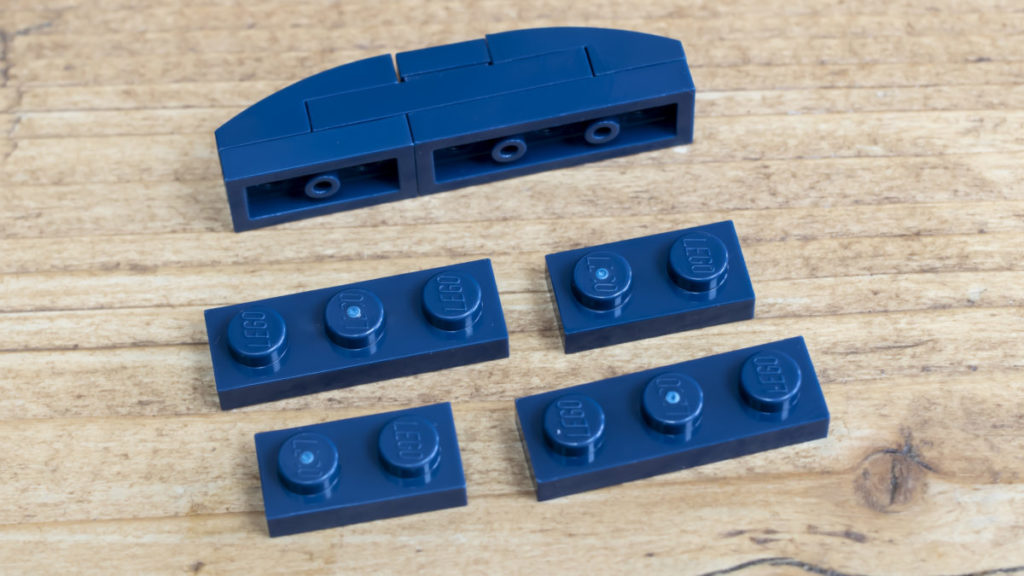
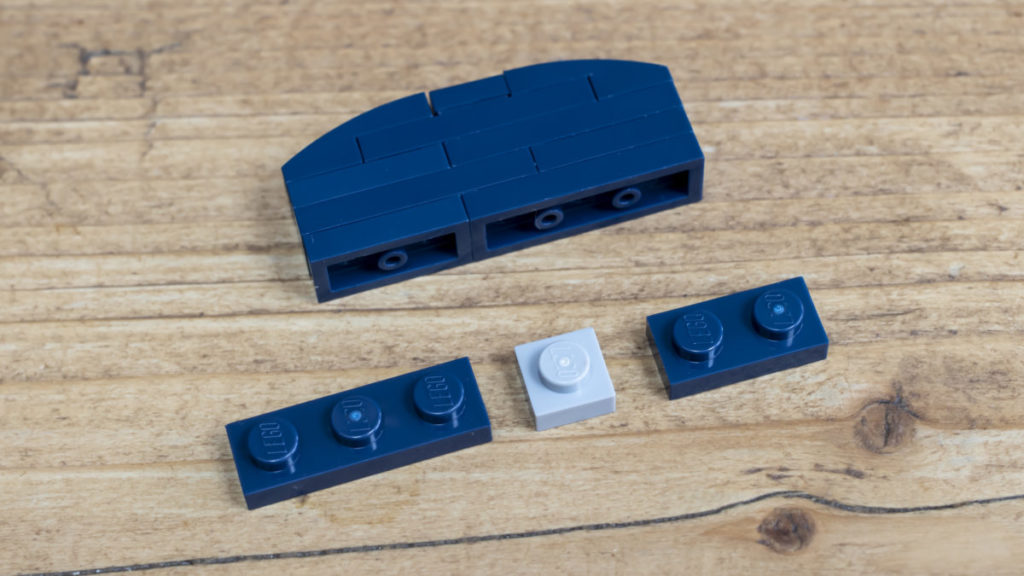
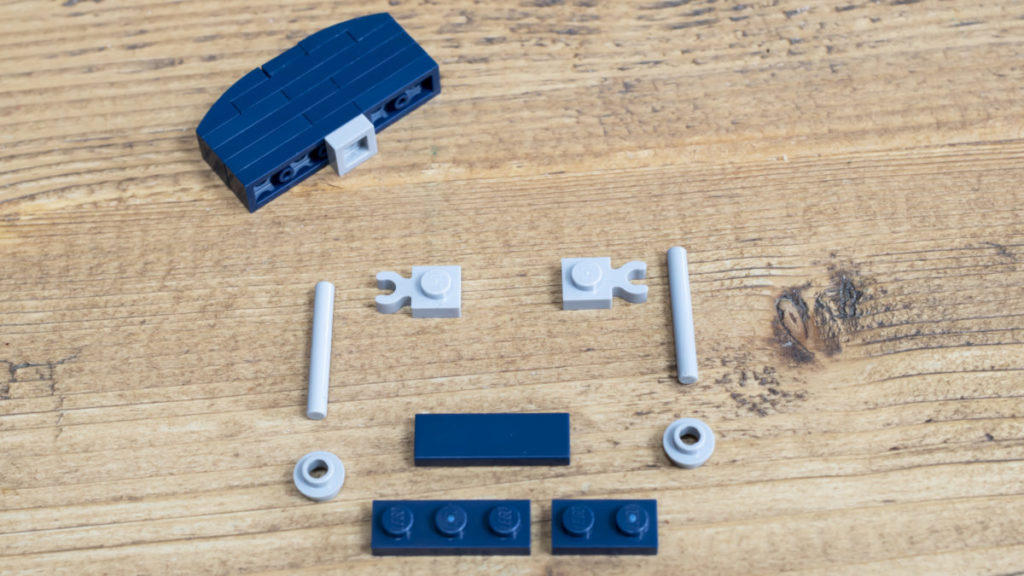
For the backrest itself, 2 1×2 sloped curves, a 1×1 tile and a 1×3 plate form the curved top. Underneath this a layer of four 1×2 and 1×3 plates is added to create the backrest itself. To recreate the chrome fittings that attach the backrest to the seat, attach two 3L bars to two 1×1 clips with plates. These then connect to the underneath of the backrest sub-assembly.
At the base of each 3L bar, attach a 1×1 round plate with open stud. Connect these to a 1×2 plate and 1×3 plate that is held together with a 1×3 tile. Attach this sub-assembly to the exposed studs on the seat, and place it all back on to the Vespa.
— The rear rack and flag —
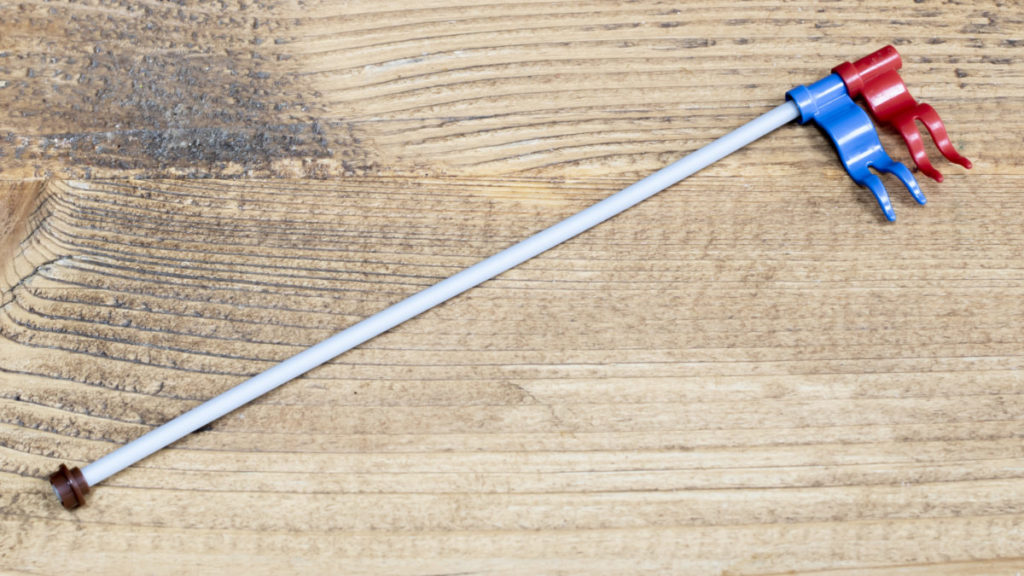
It was commonplace to see some sort of flag or faux foxtail flown from a flagpole attached to the back of a mod’s scooter. Using the back rack that is already included with the model, a simple tweak to the design will add this feature too.
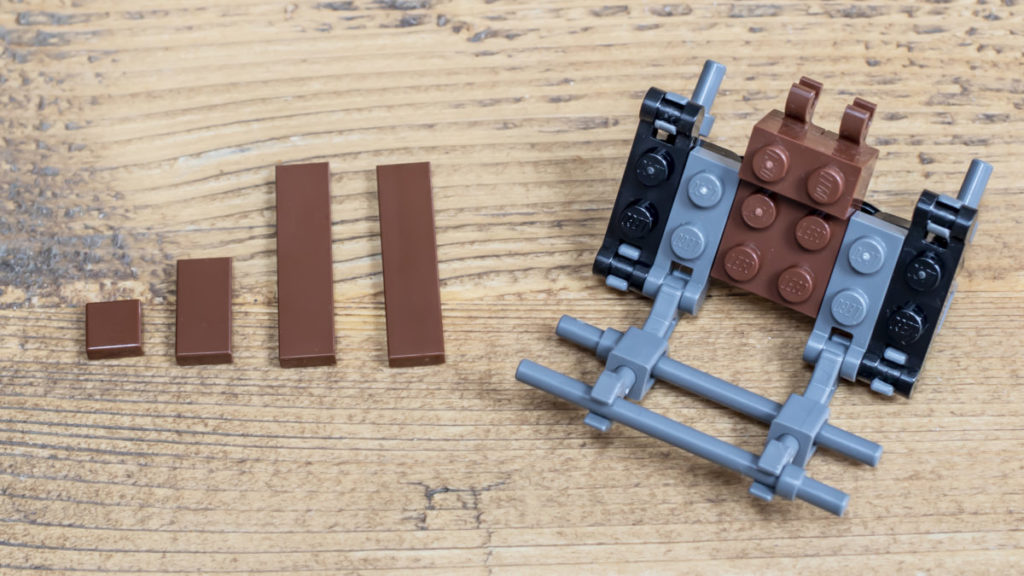
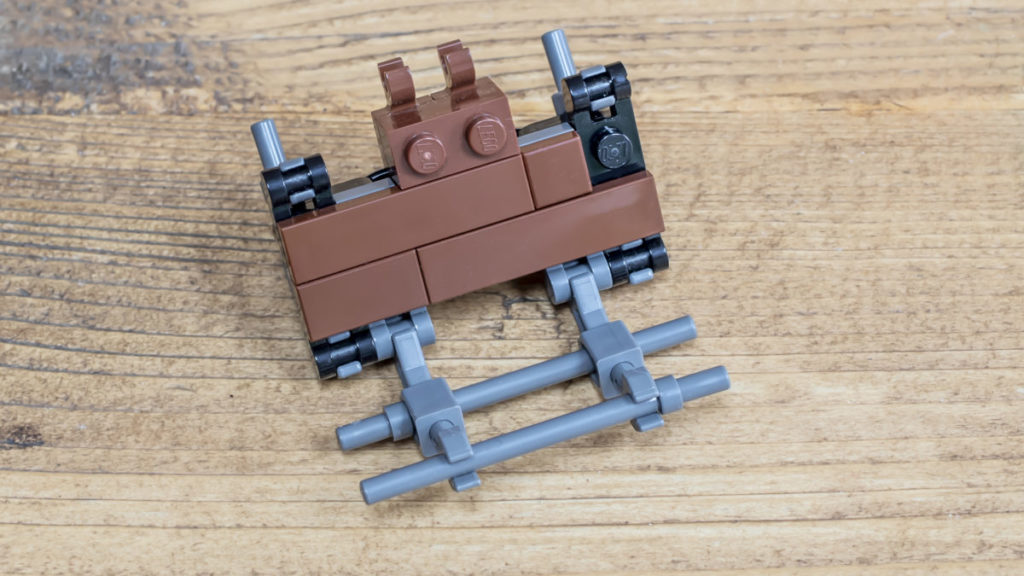
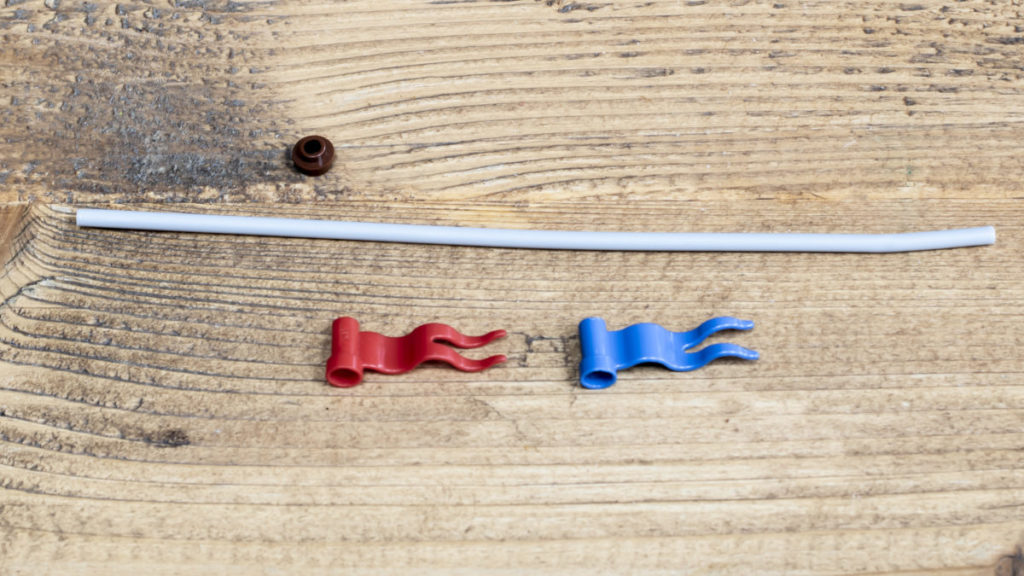
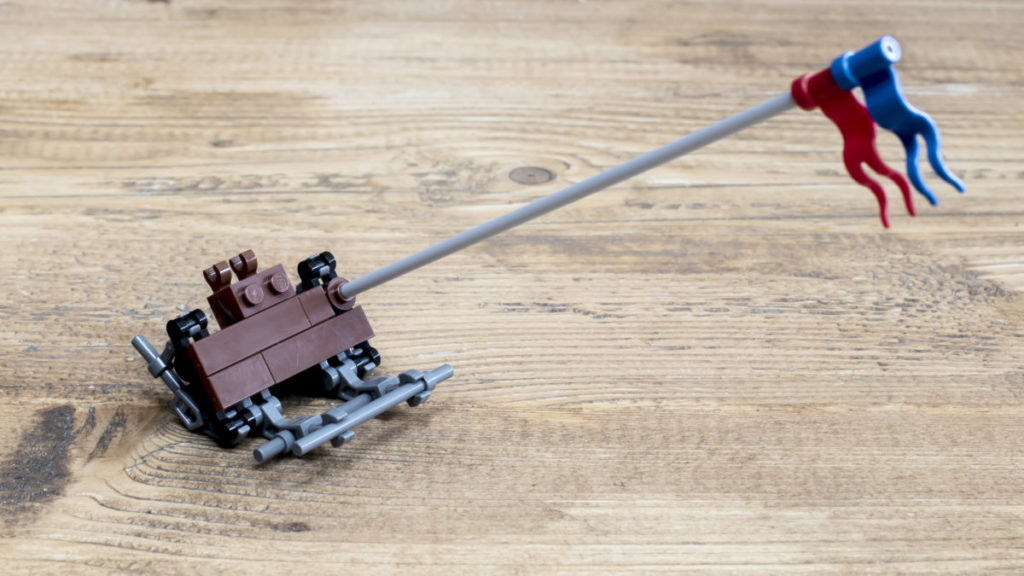
Remove the 2×6 brown tile from the back rack and replace with two 1×4 tiles, one 1×2 tile and a 1×1 tile. Attach a 1×1 round plate with open stud to the remaining stud and insert the rigid 21L hose piece that will make up the flagpole. Then simply add a flag of your choosing to the top – we’ve gone for a red and blue flag to tie in with the Union Jack motif commonly used by the mods, but any flag will have the same effect.
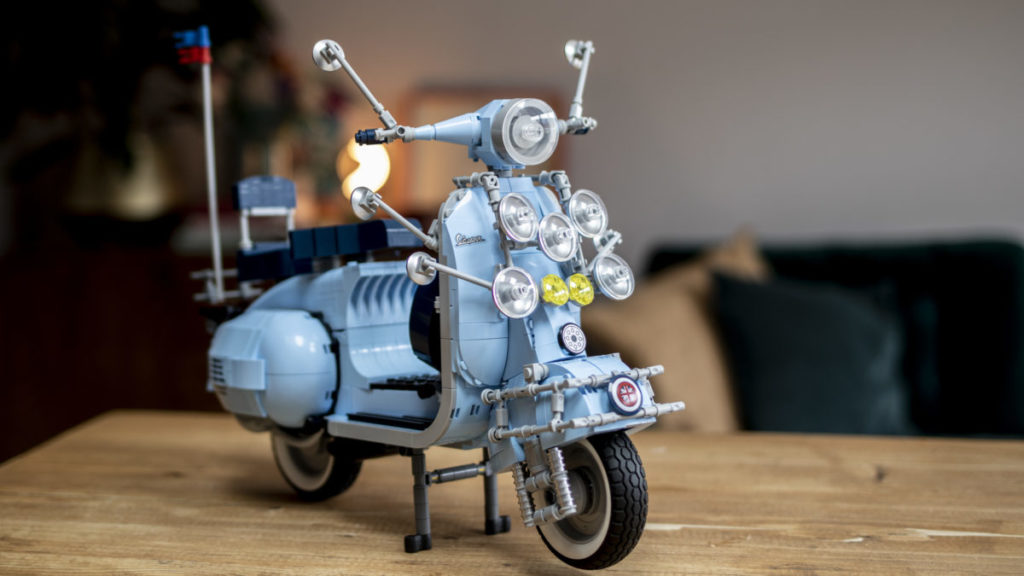
All these accessories are easily added or removed, allowing you to customise your LEGO Vespa however you see fit. There’s even scope to add more wing mirrors, lights or whatever else you see fit – get creative and have fun!
Support the work that Brick Fanatics does by purchasing your copy of LEGO Creator Expert 10298 Vespa 125 using one of our affiliate links. Thank you!
Author Profile

- I have more than 20 years in television production and photography and can finally put all that experience to good use by combining it with my number one passion in life, LEGO! I love all things brick-related, but the theme that really floats my boat is the original LEGO Pirates range. I currently have a LEGO wishlist that far outstretches my shelf space... and bank balance!
Latest entries
March 2024 sets17/04/2024LEGO Technic 42179 Planet Earth and Moon in Orbit review
March 2024 sets13/03/2024LEGO Technic 42165 Mercedes-AMG F1 W14 E Performance Pull-Back review
March 2024 sets07/03/2024LEGO Technic 42171 Mercedes-AMG F1 W14 E Performance review
March 2024 sets21/02/2024LEGO Icons 10330 McLaren MP4/4 & Ayrton Senna review














Did anyone ever get a parts list for these brilliant additions? If so can they publish/email to me?
Ein Traum von einer Vespa, bin total überfordert mit der Beschaffung der benötigten Teile.
Gibt es eine Liste der Teile mit Teile Nr.?
Gruß aus Berlin
Does anyone have ideas on what parts to order and where to source from please
Stunning, don’t know how long it will take me to reproduce, but I’ll try to source the parts and have a go.
Where can I buy these extras
Have you found out yet
Wish this was sold as add on kit , looks as tho was ment to come like that what stunning way to finish it off
Are these additional parts for modding or are they in the kit
? Klasse! Genau sowas habe ich auch vor! ? Besser kann man es wohl nicht „Mod“ifizieren?! Mal schauen!
(Eine „Skelly“-Version wäre noch interessant.. ?)
Echt super Arbeit!
Awesome great job
At first I thought that this modification are Clarkson’s mirrors from Vietnam special 😀
Can we have a list of part numbers
Can we have a parts list with part numbers added so it makes it easier ?
Real noob question. I bought the vespa Lego as I love all that mod stuff. I want to make the vespa more mod. Is there a technics kit or pack that would give me all (or most) of the bits needed to add to the vespa? I don’t have any other Lego.
Brilliant!
Good scooter kit like we went back to the 60’s in the 20’s